Install VALR
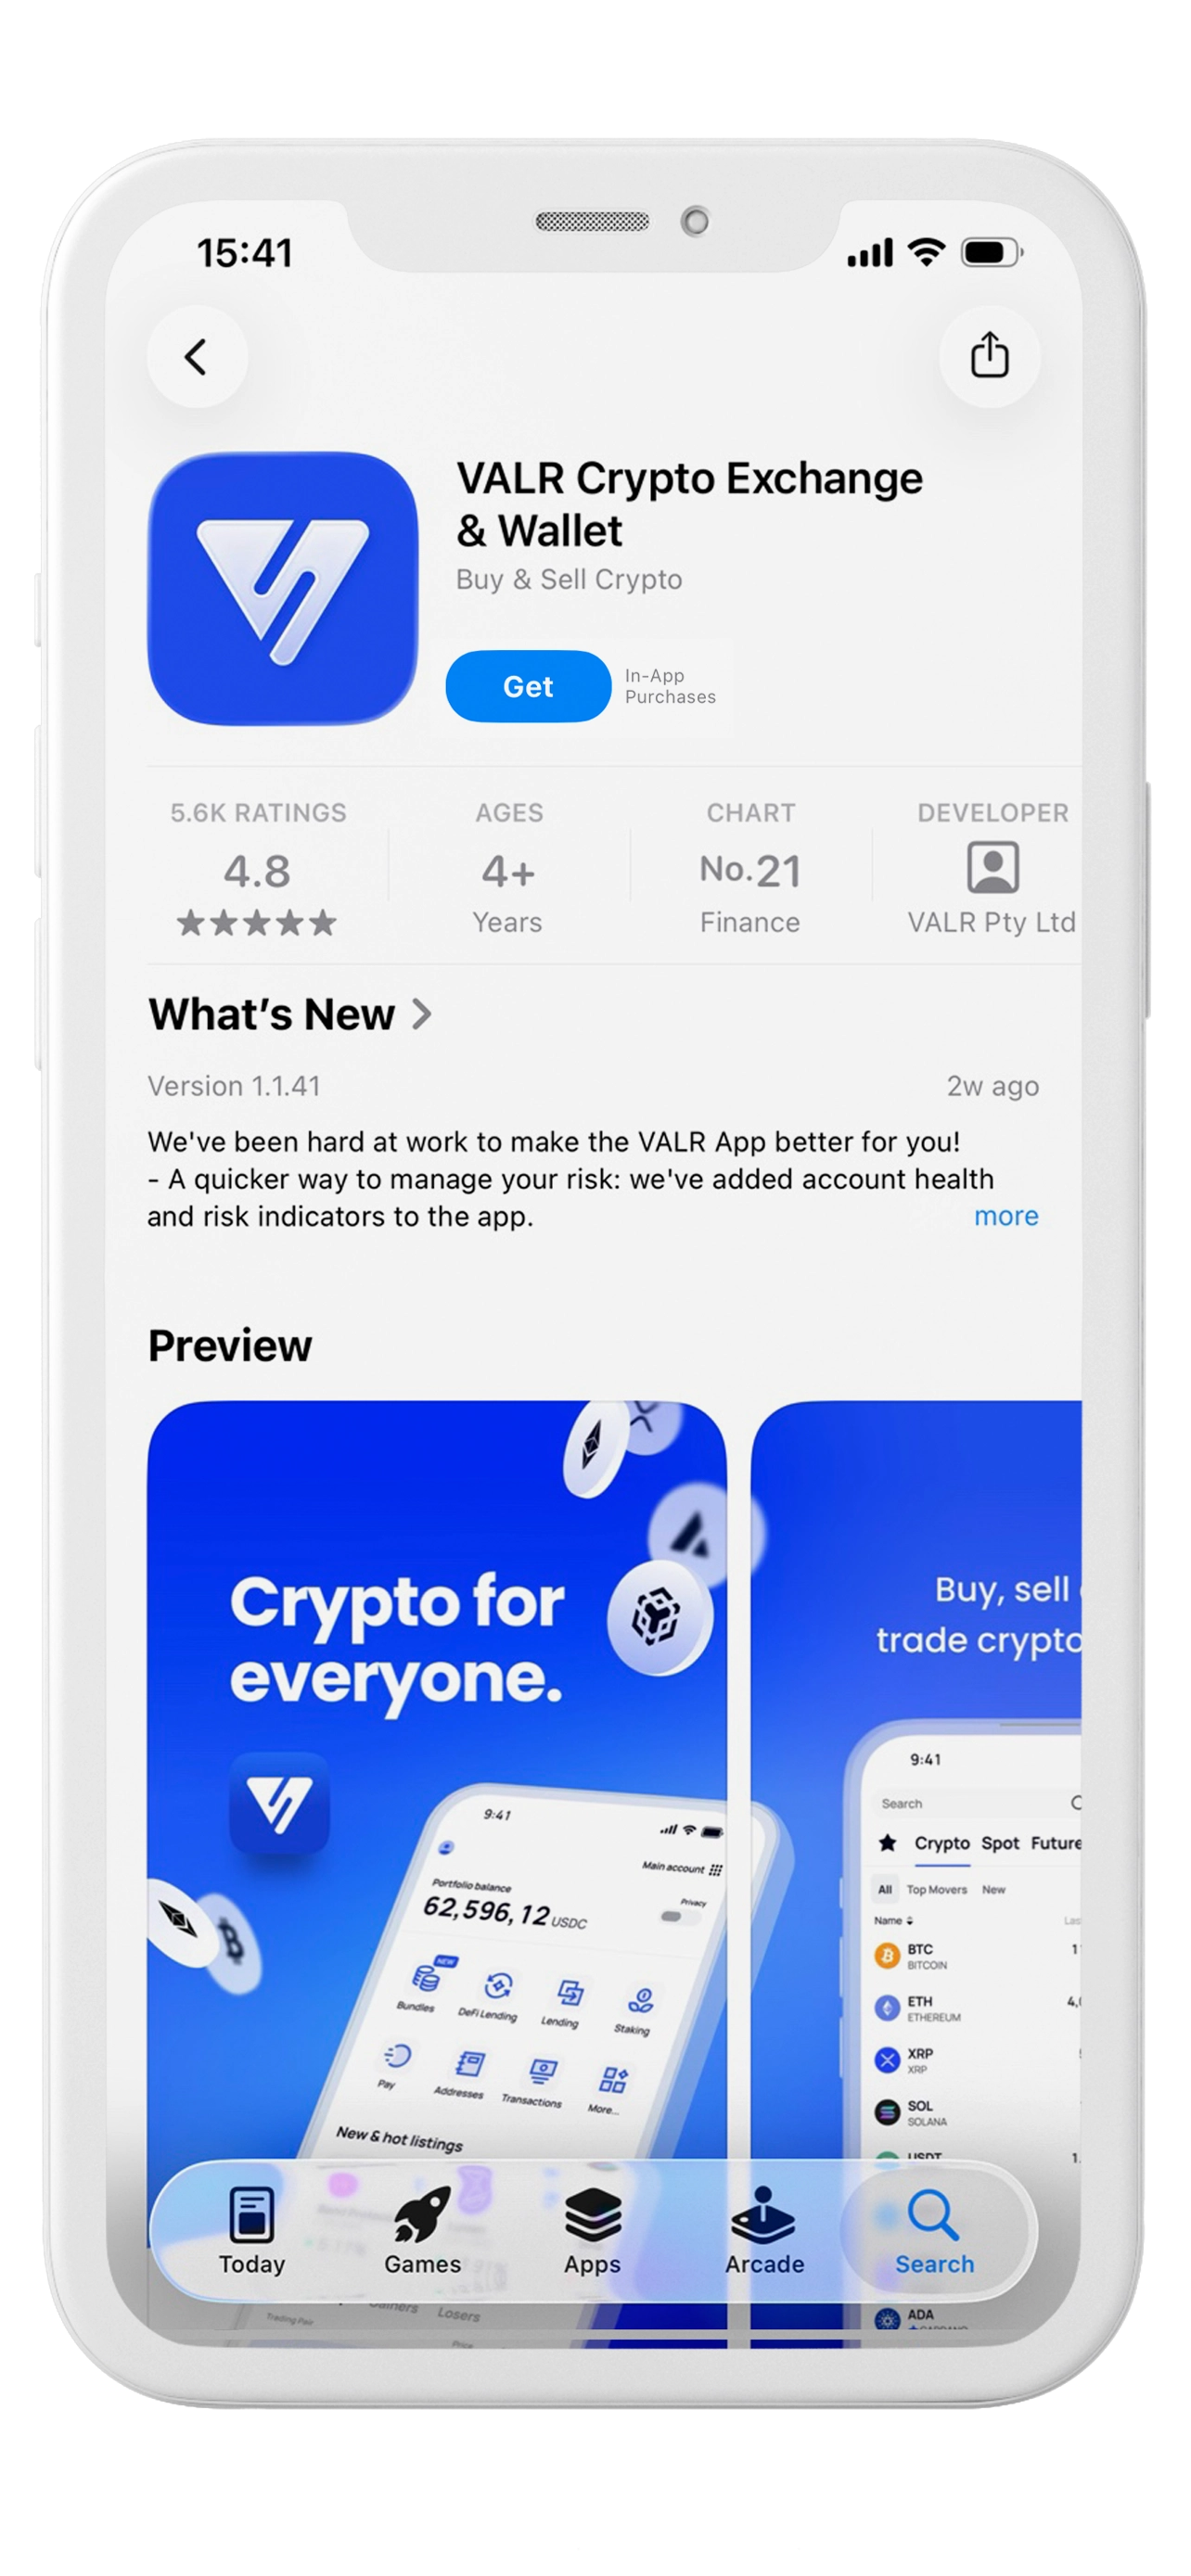
Download the official VALR Exchange & Wallet app from your app store.

Check: Open the app listing and install only the official VALR App.

A clear, step-by-step visual guide showing how to deposit ZAR into VALR, purchase USDT, and transfer it to your eMovly account, so you can begin investing with confidence.
The user starts with a Bank Deposit into VALR, converts the ZAR Balance into USDT, then sends the USDT to the Address generated from the eMovly Account.
Create the account, verify email, and complete identity verification.
Pay VALR from your Bank using the exact banking details and unique reference.
Use the ZAR balance inside VALR to buy USDT (Tether).
Copy the eMovly address and send USDT using the Ethereum network.
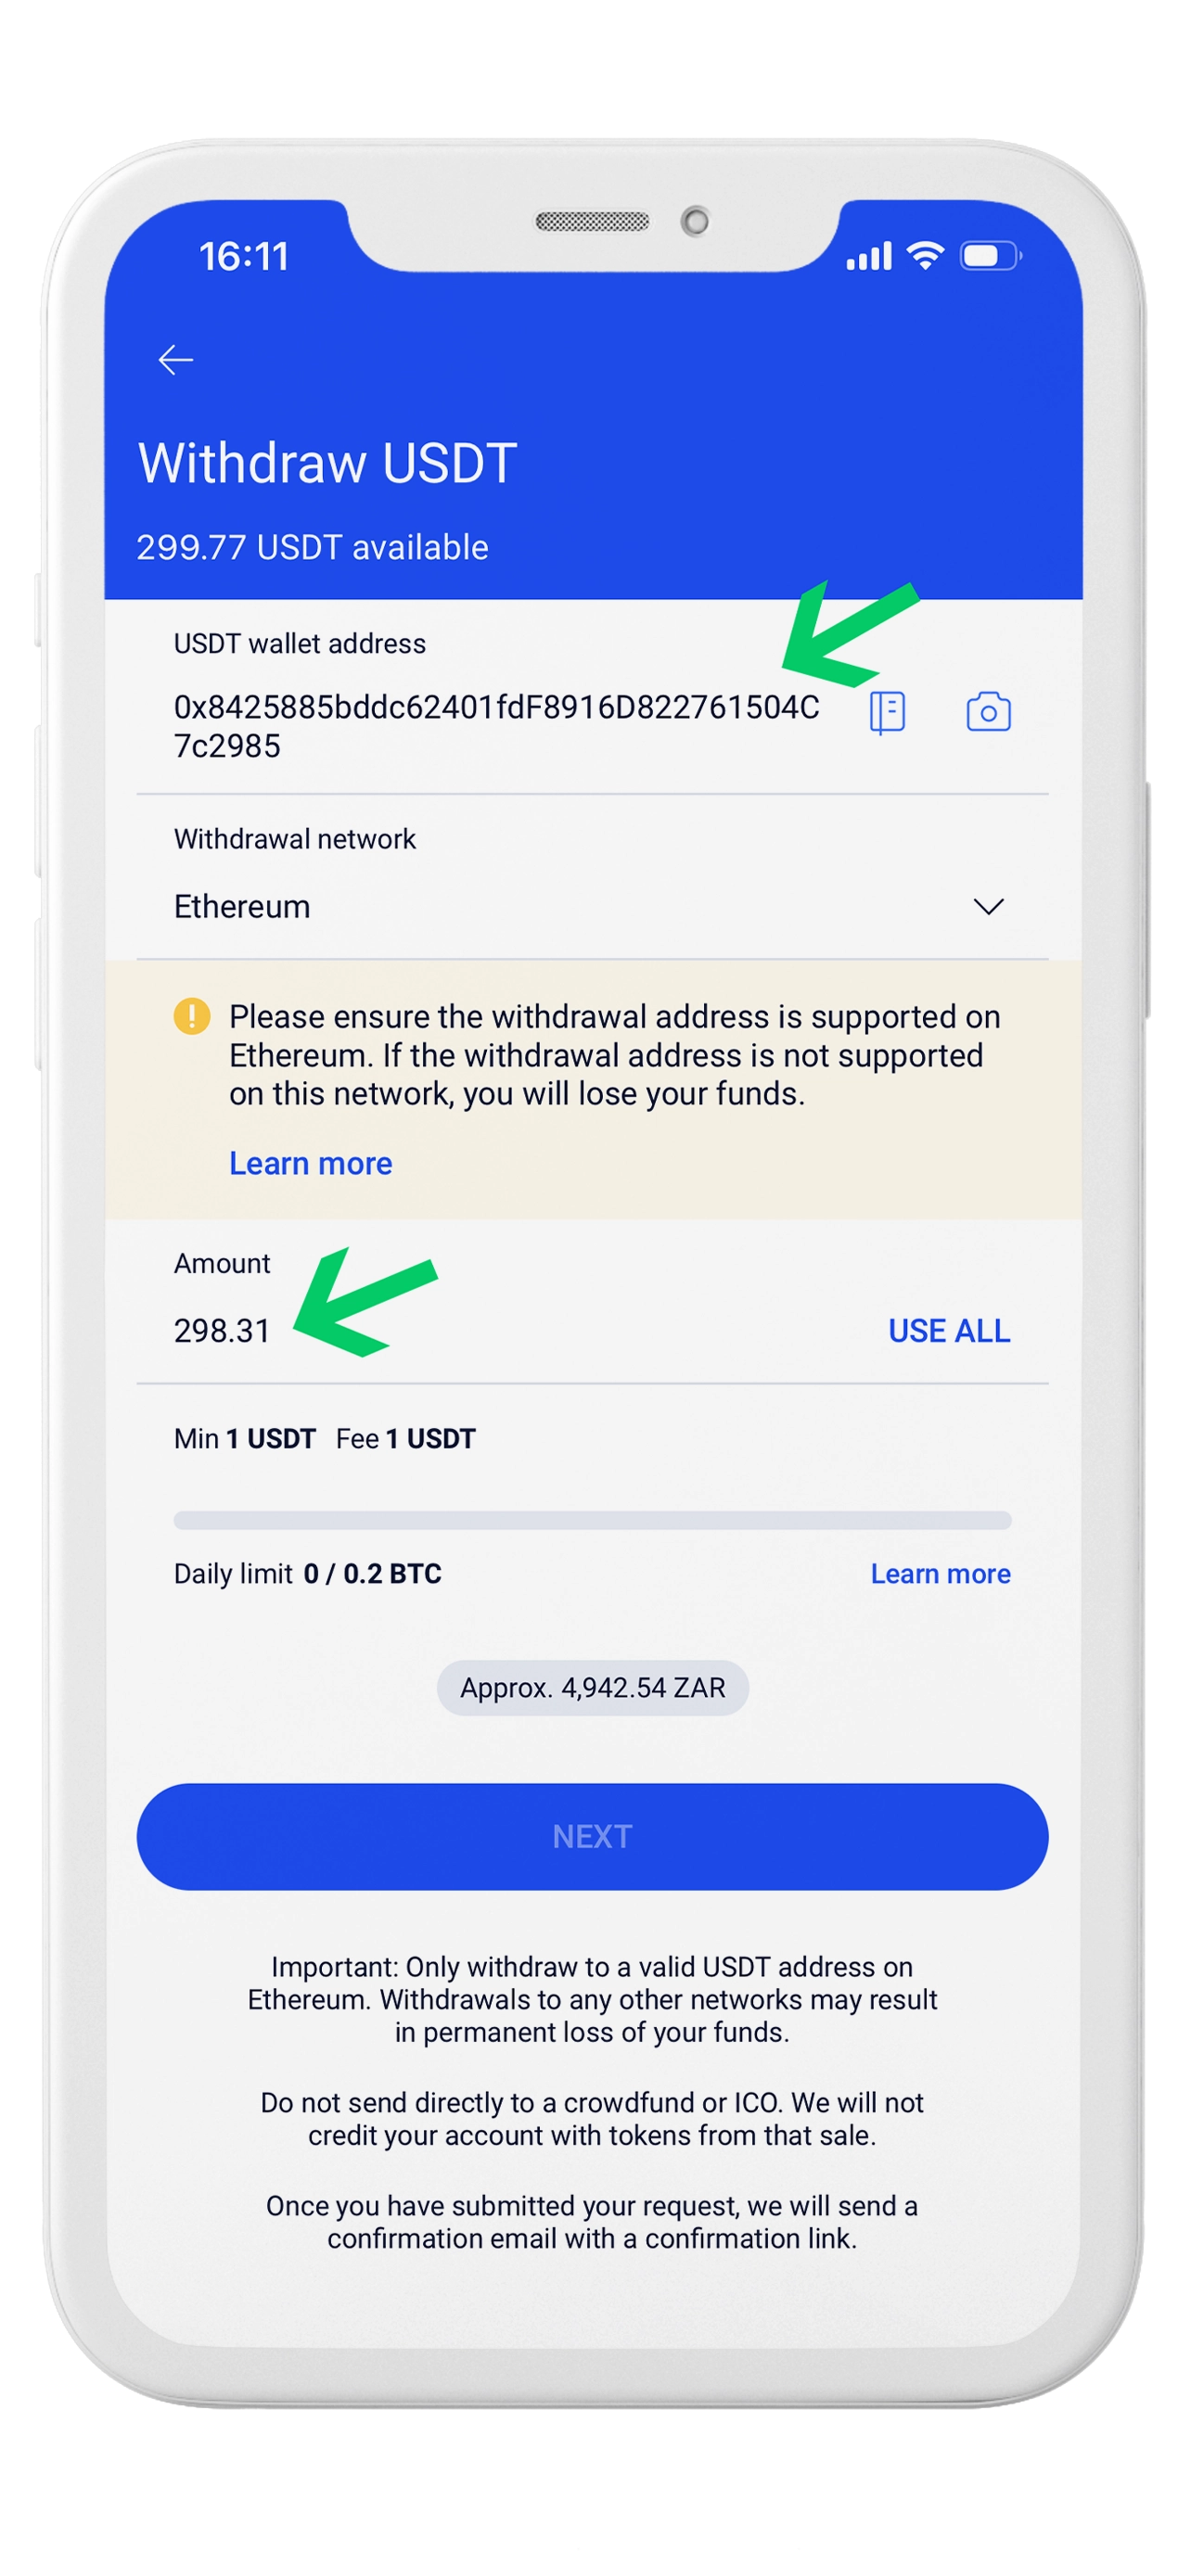
The transfer must use the ETH / Ethereum (ERC-20) network because the eMovly wallet only supports USDT on that network. If you send USDT using a different network (like TRC-20), the funds won’t be received and may be lost.
Each step shows exactly what to do to complete every transaction correctly. Follow this guide closely; your screen may look slightly different, but the overall process remains the same.
Download the official VALR Exchange & Wallet app from your app store.
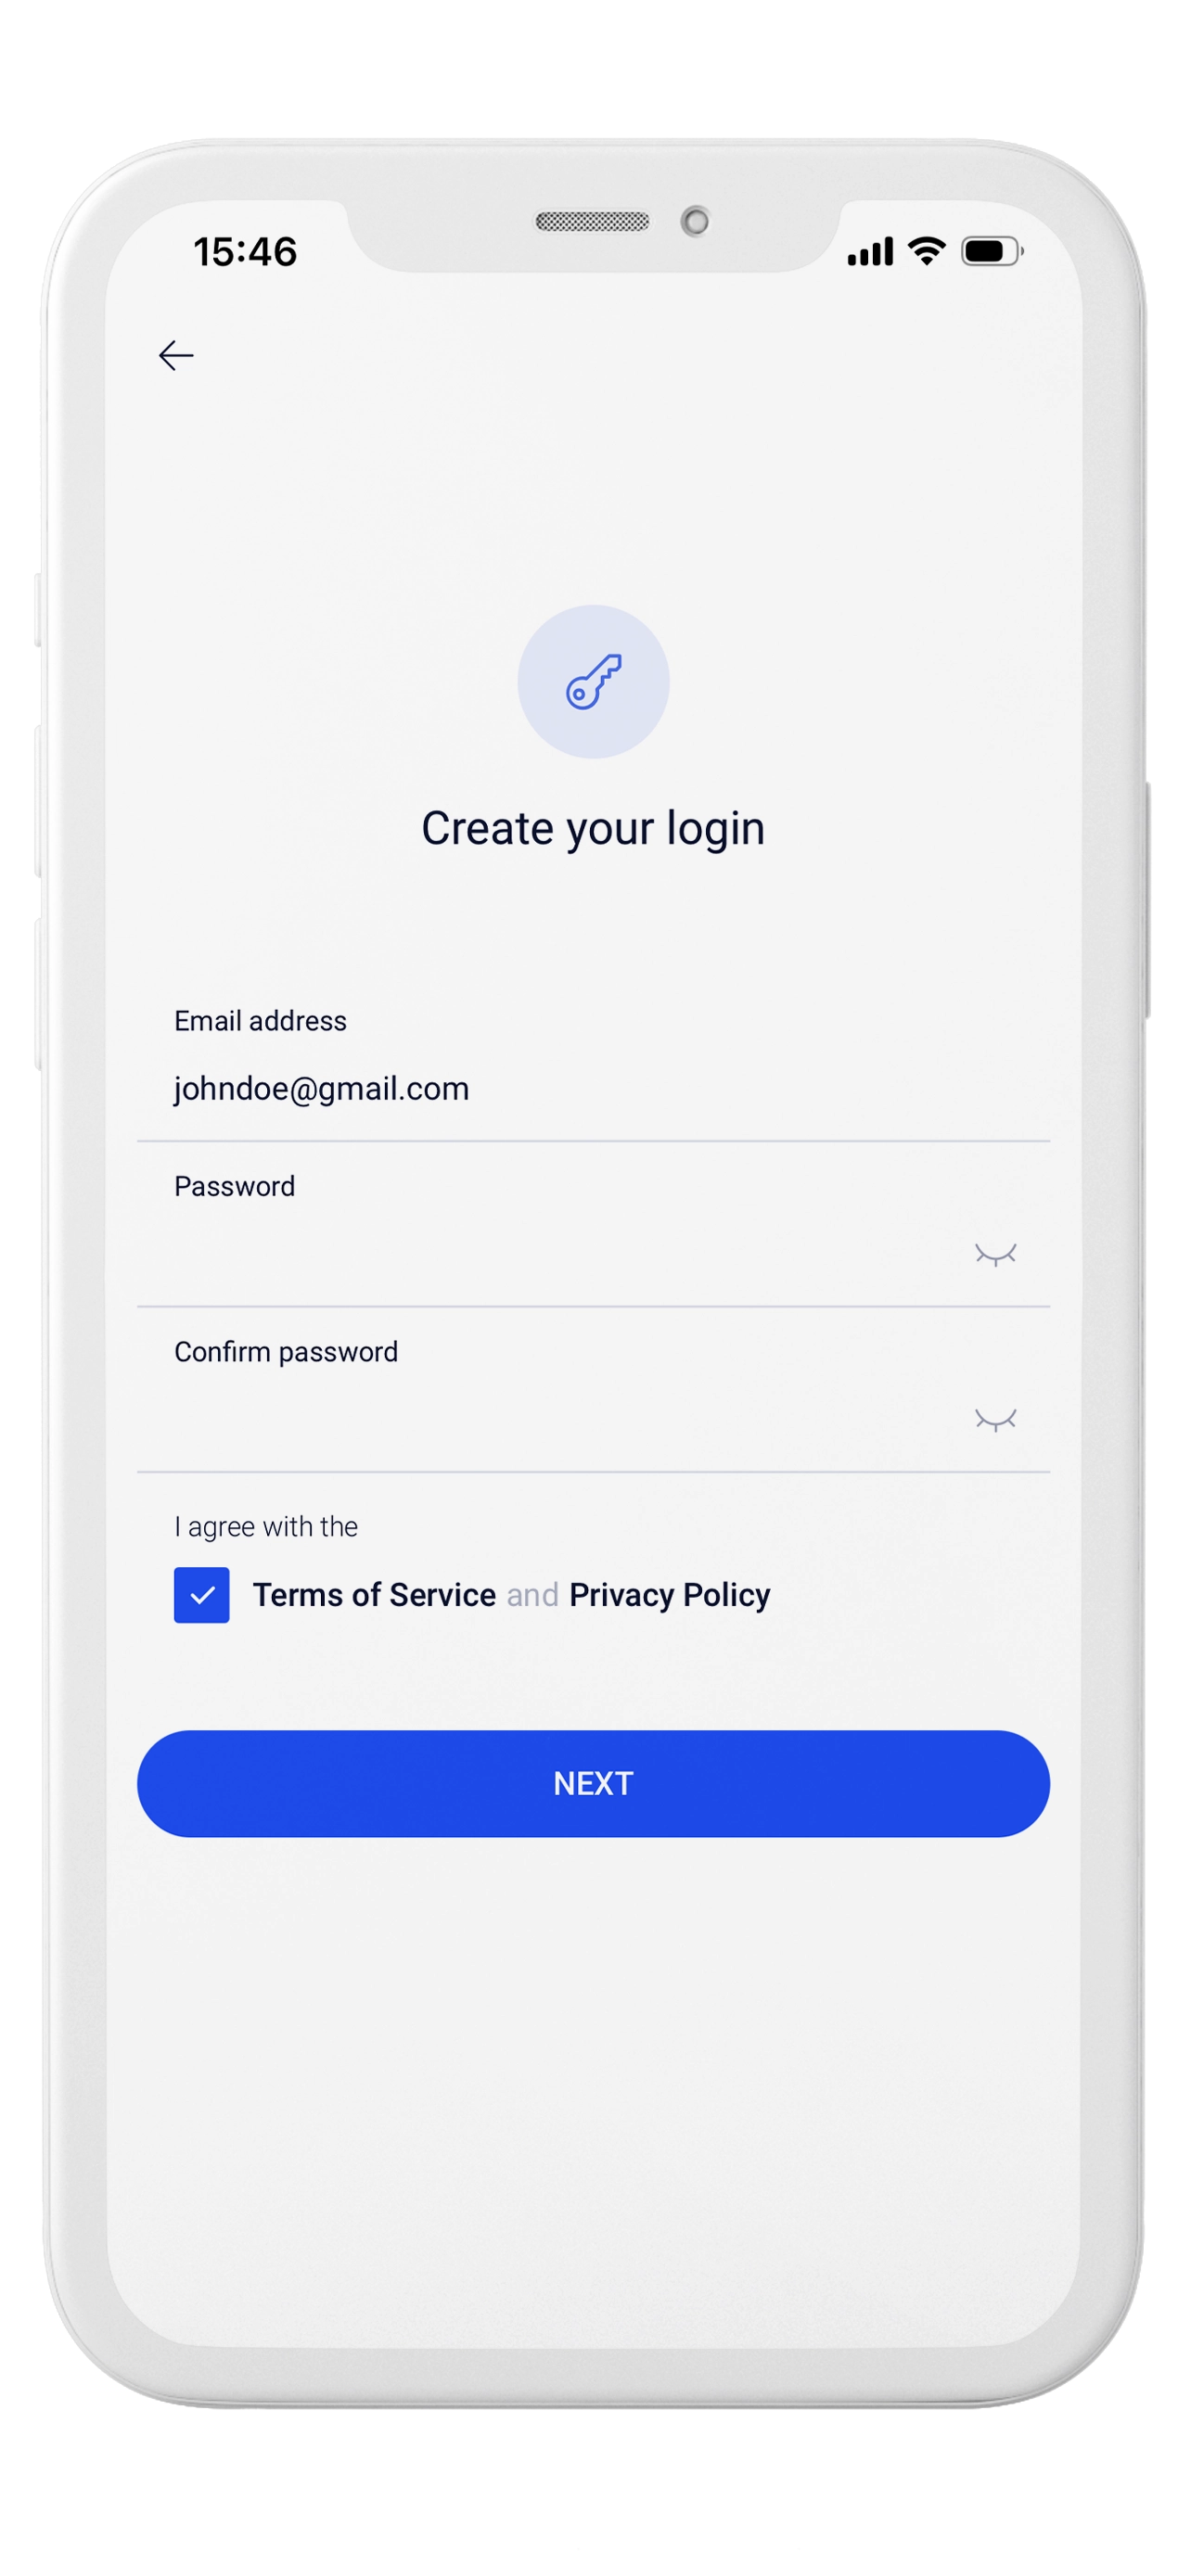
Launch VALR and choose Create Account. Enter your personal details exactly as they appear on your ID document.

Enter your email address, create a strong password, accept the terms, then continue.
Open the email sent by VALR, confirm your email address, then return to the App.
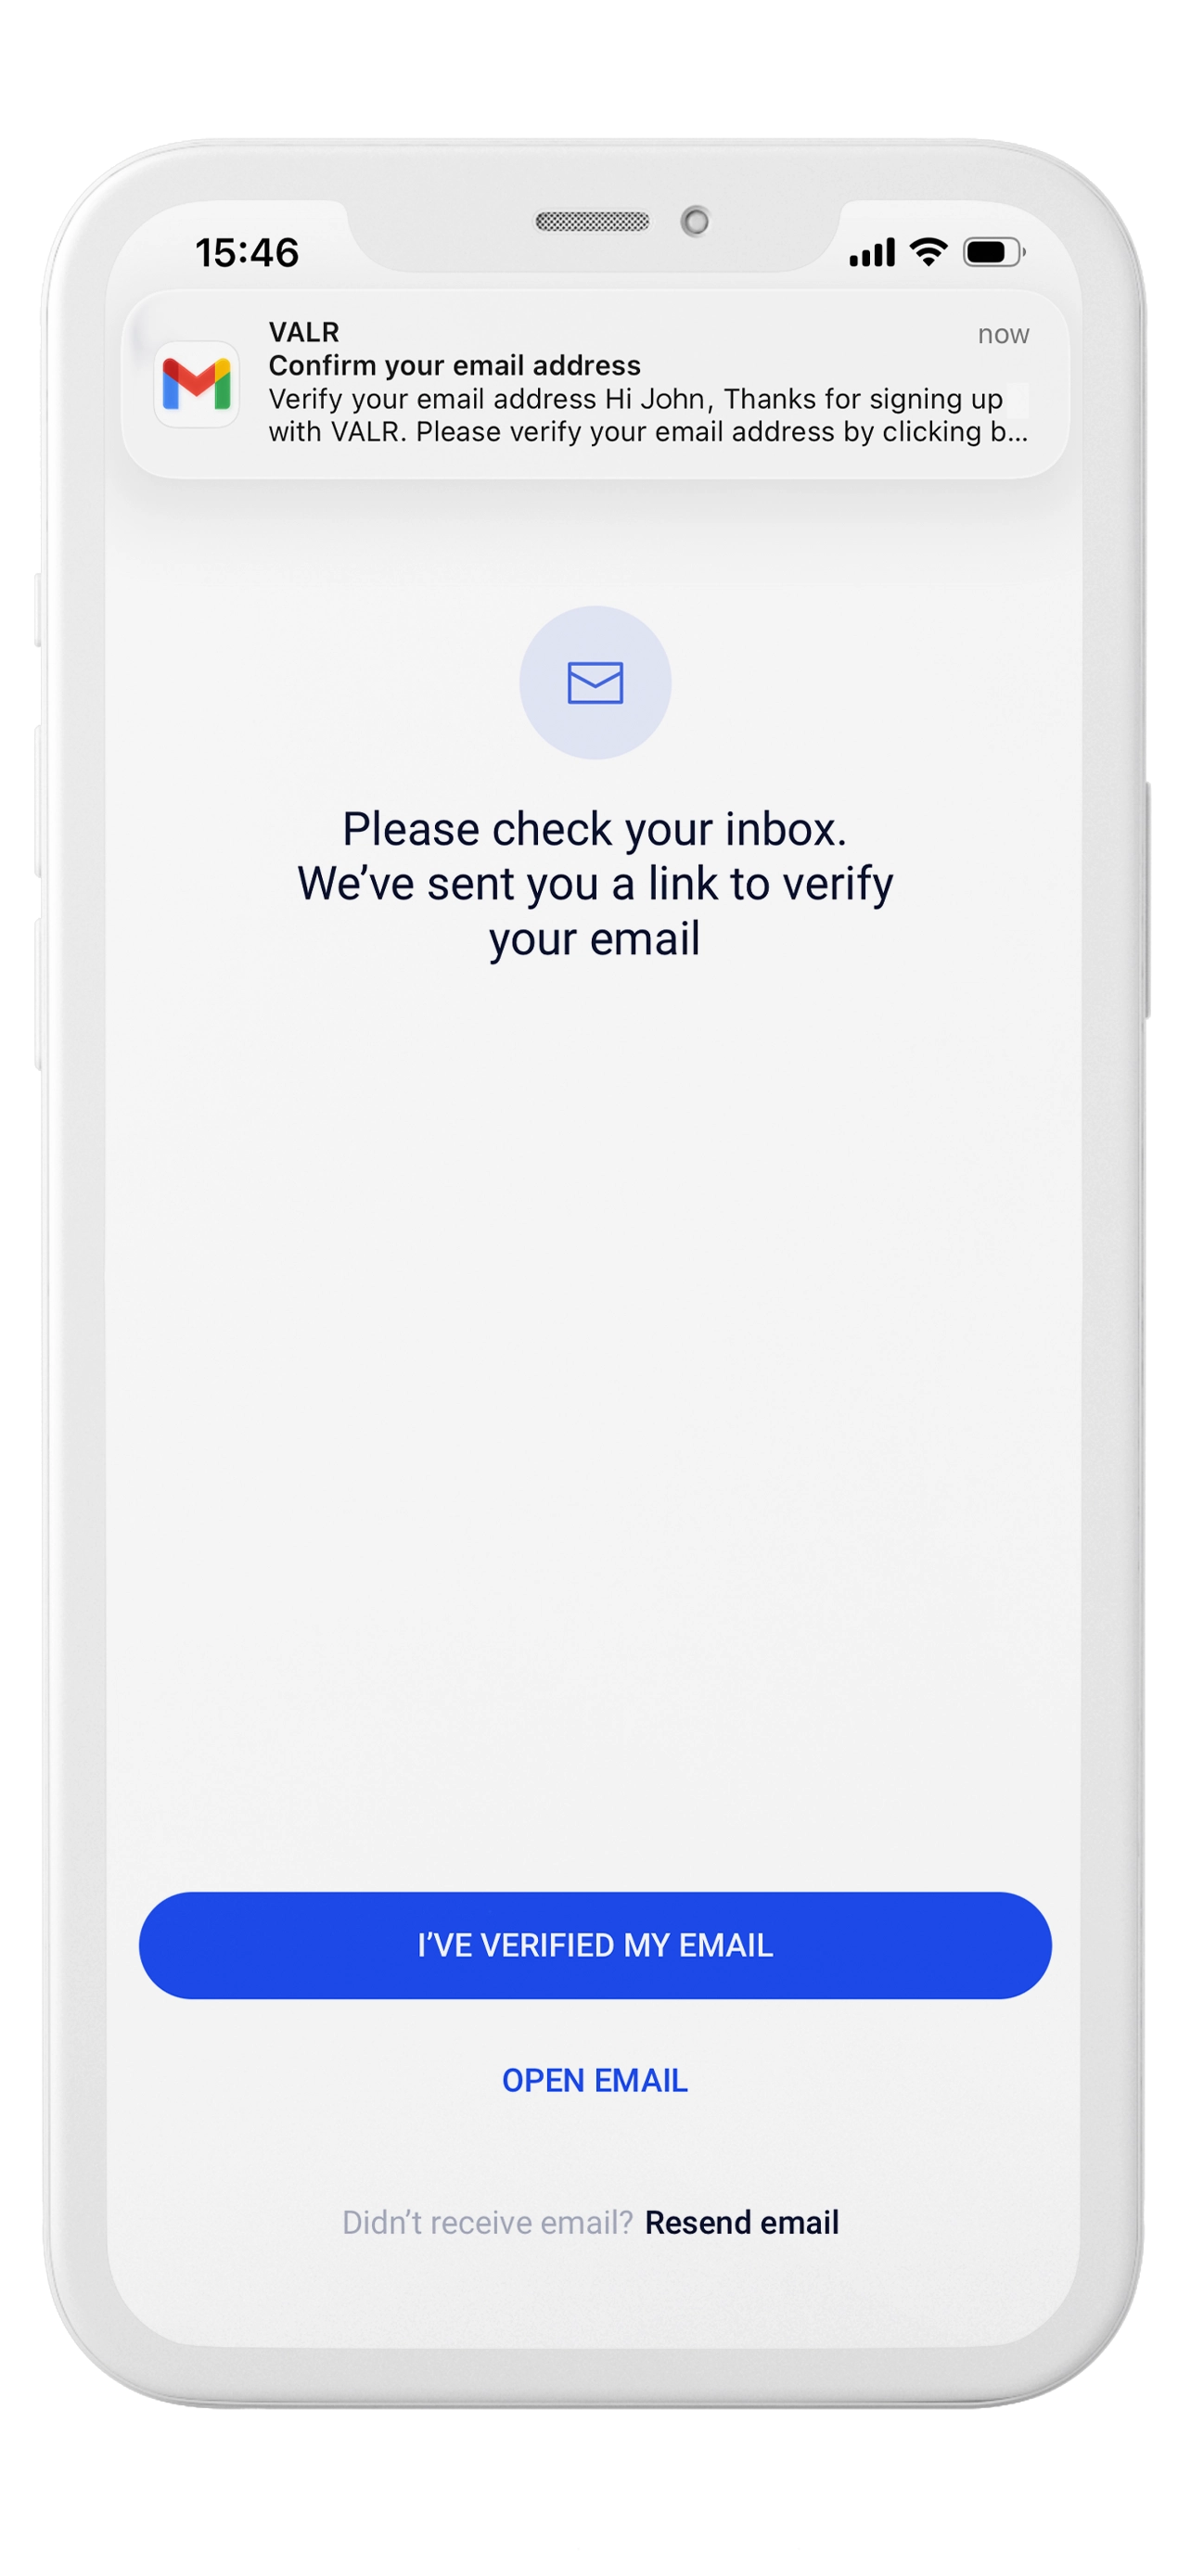
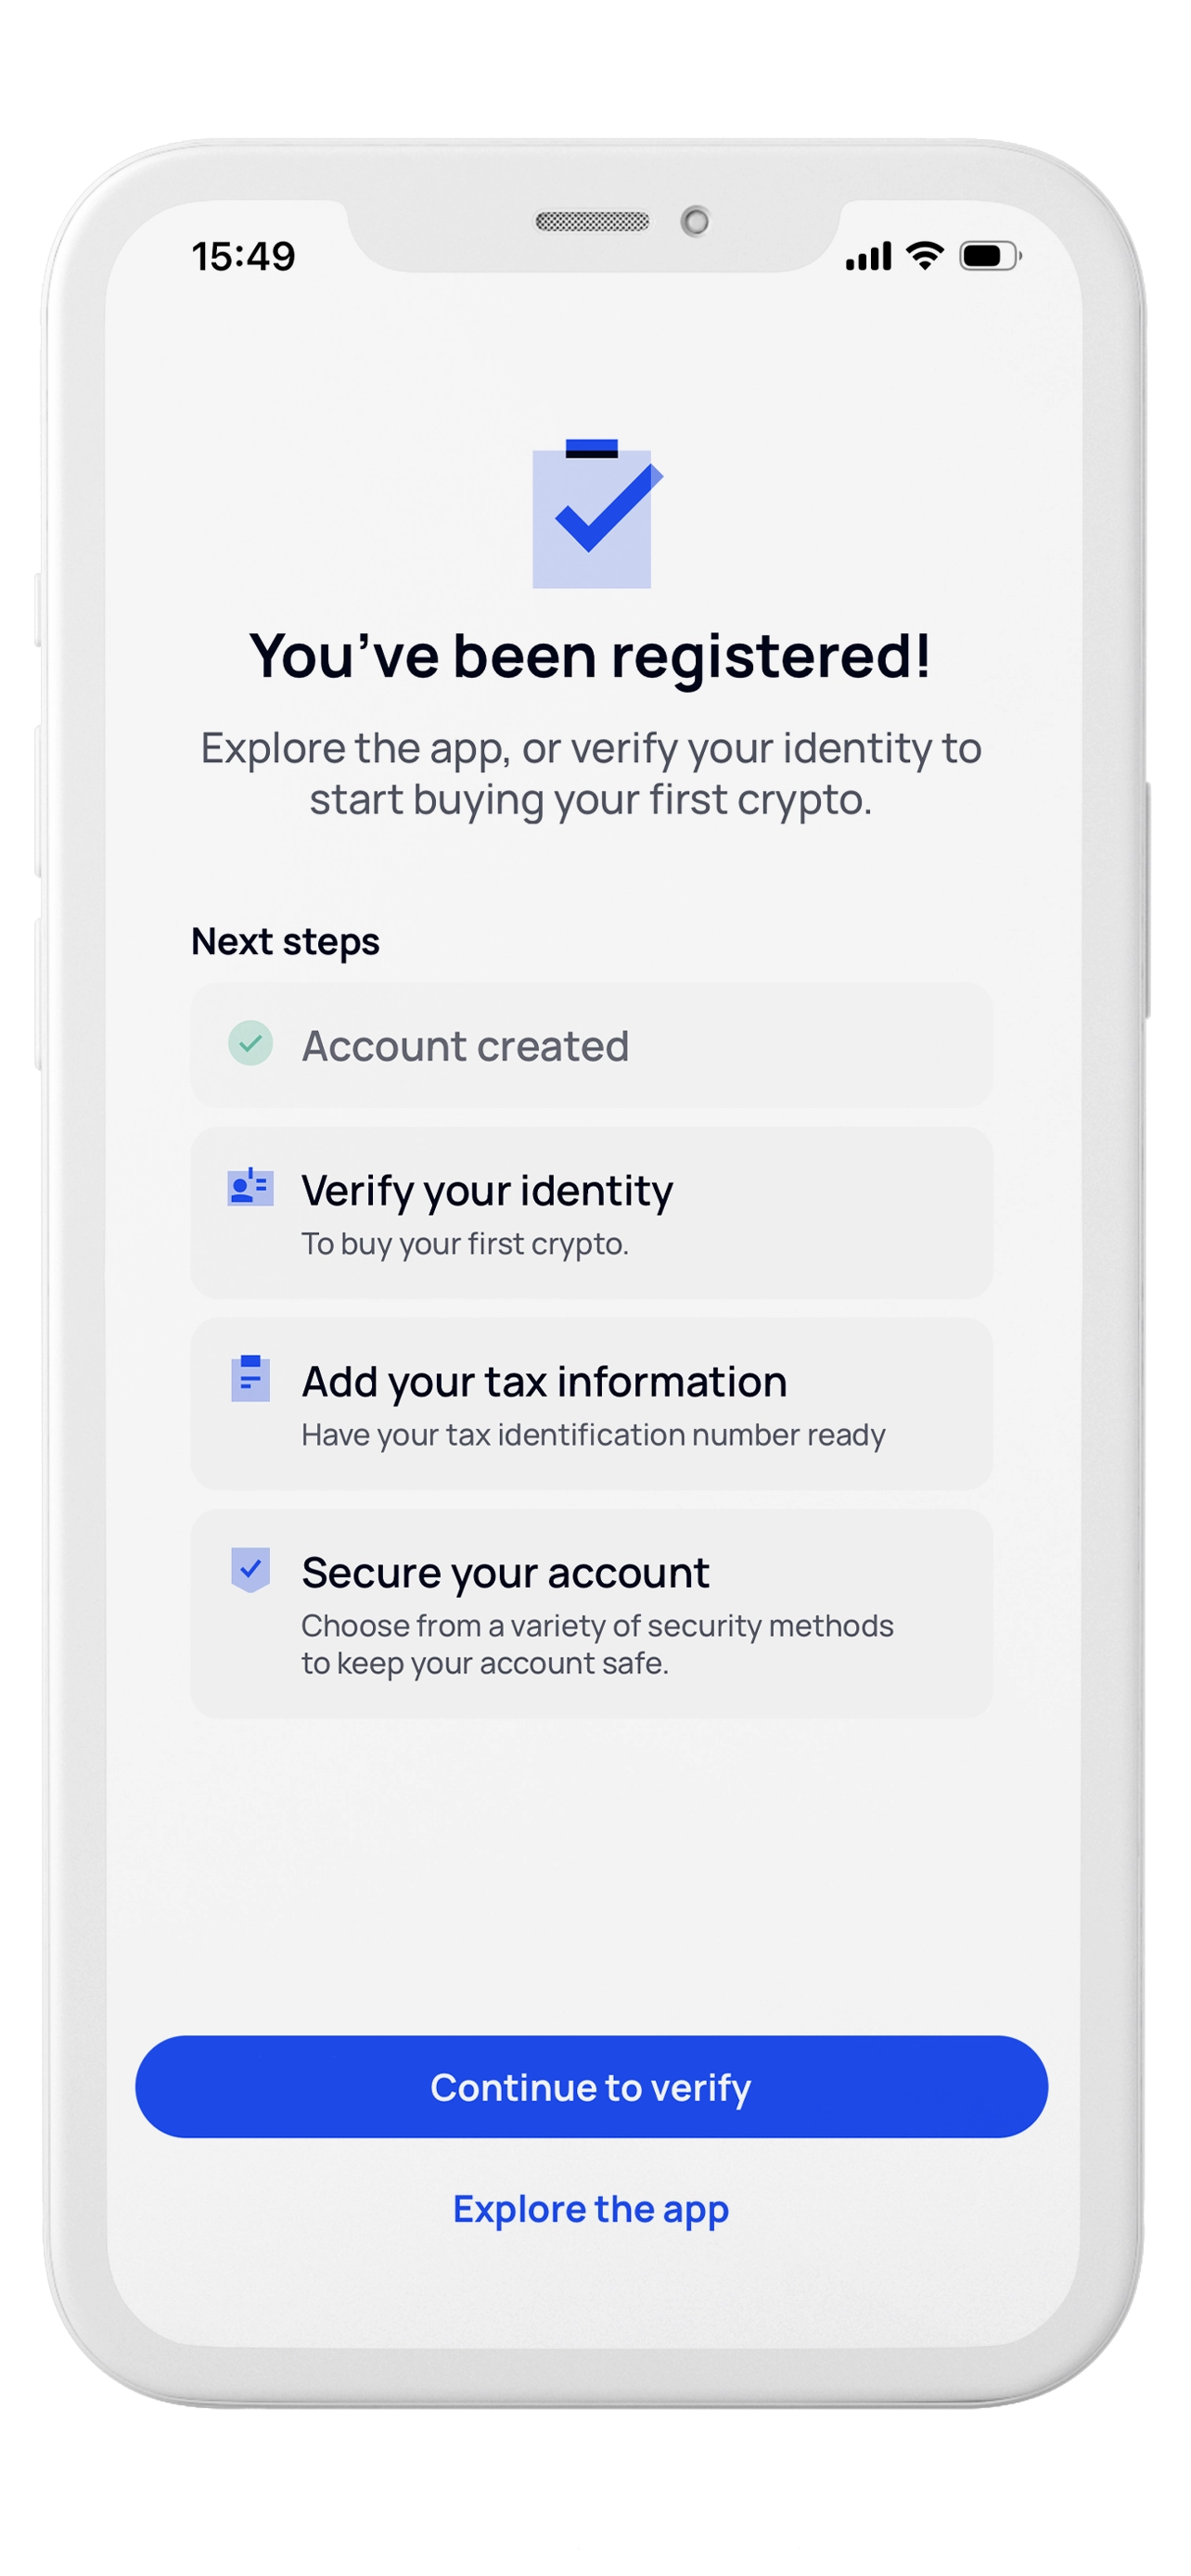
Sign in and continue to verify your Identity. Have your Identity Document ready.
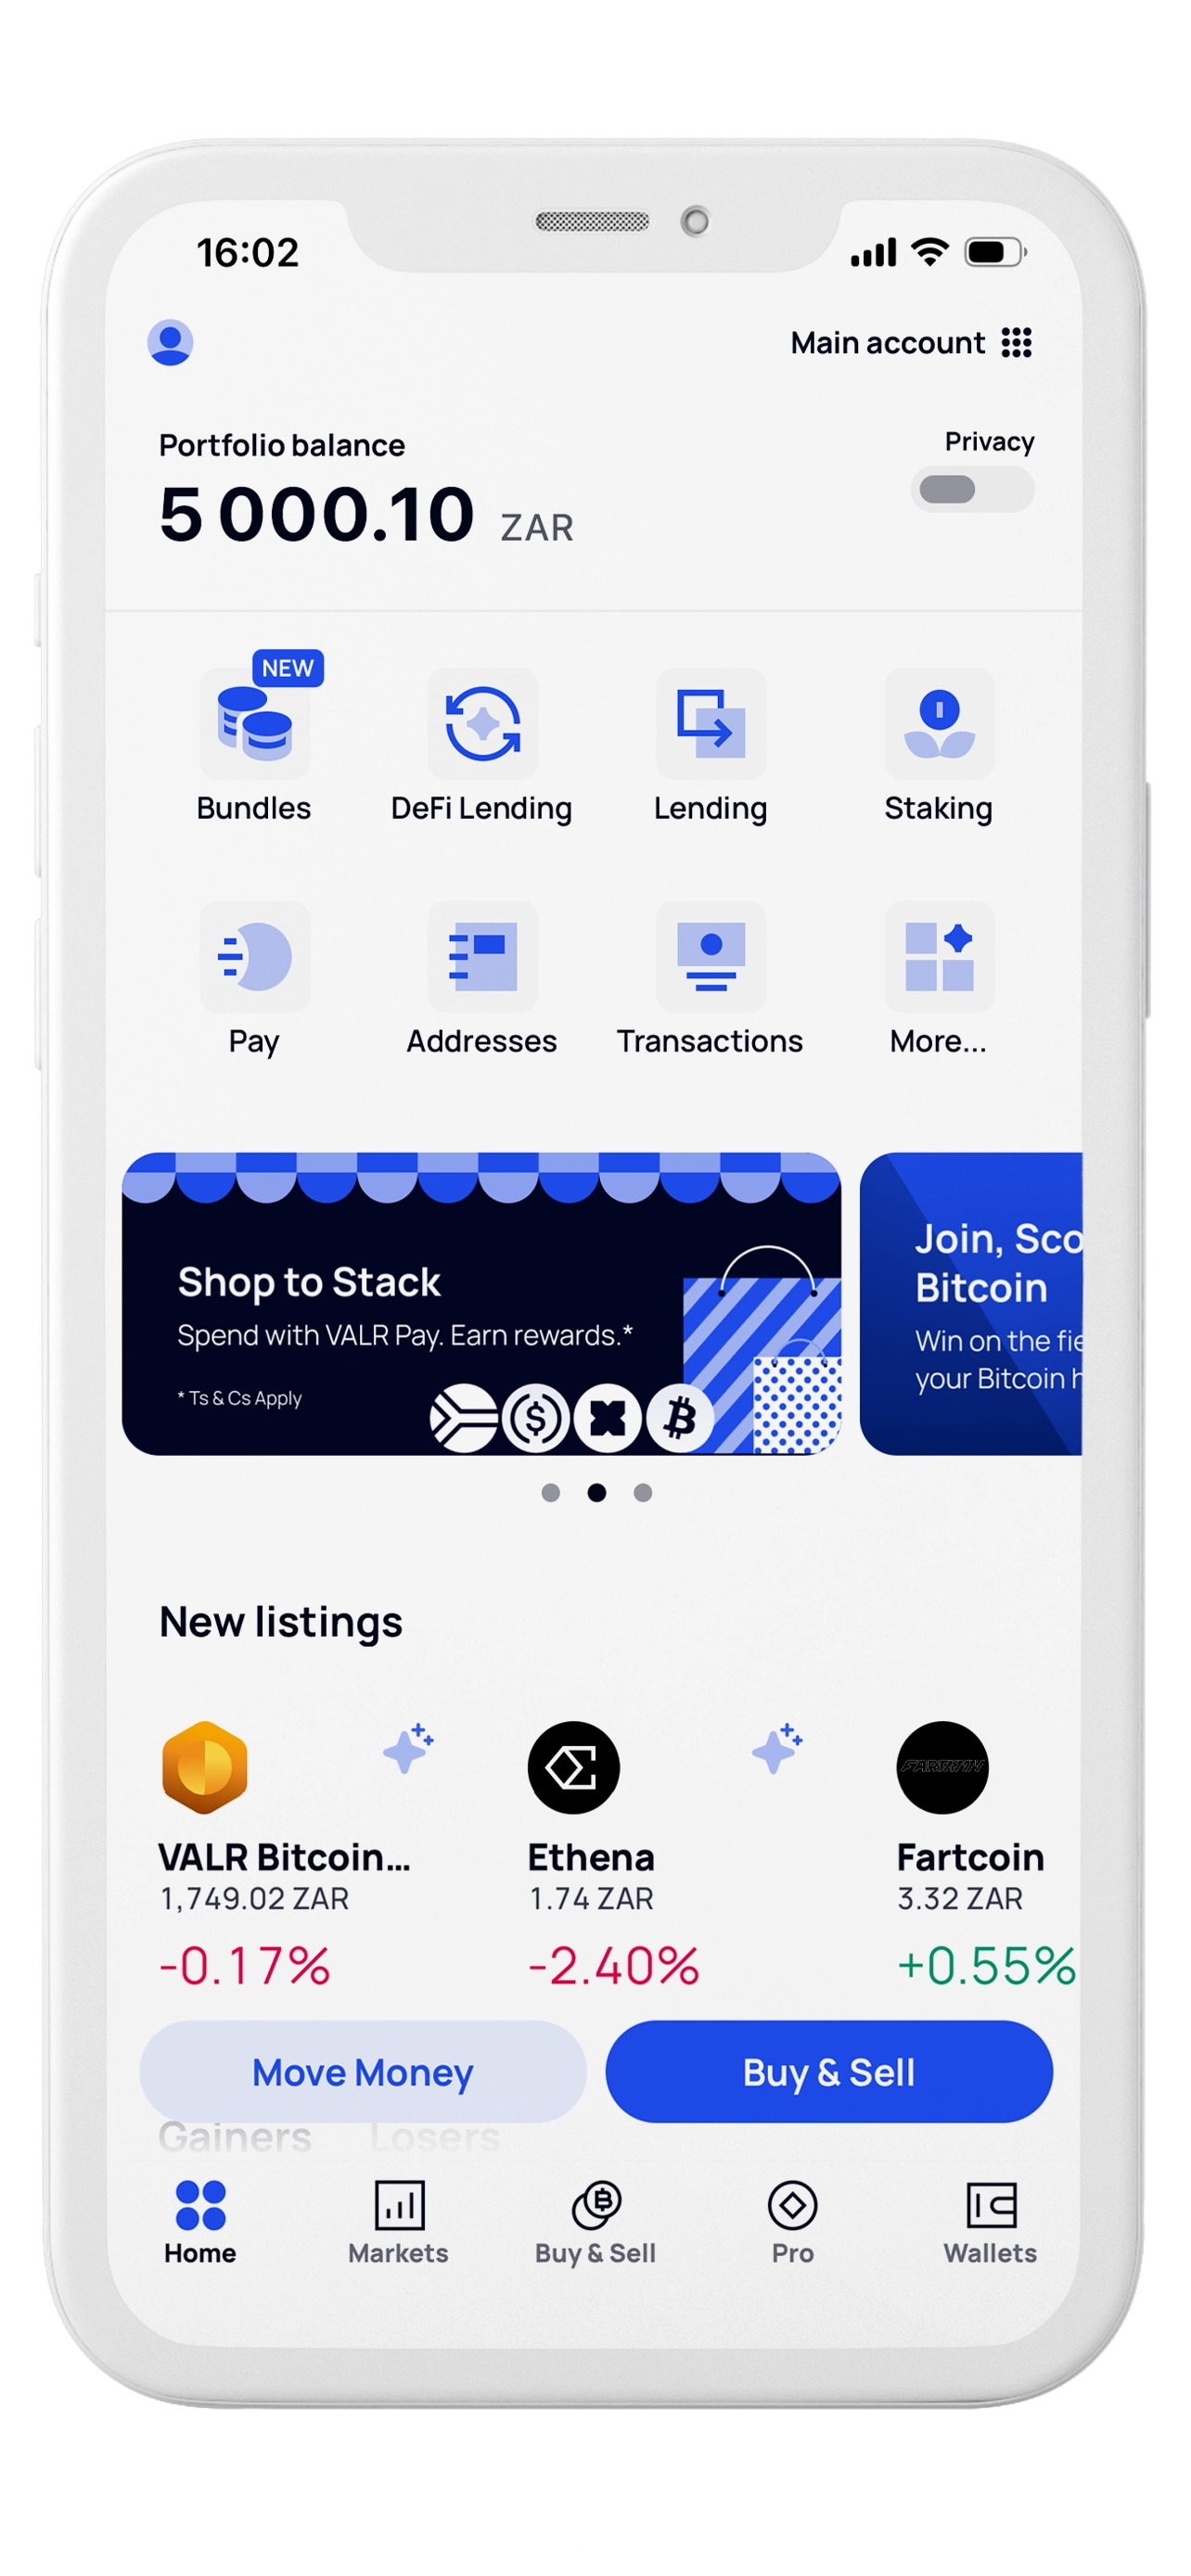
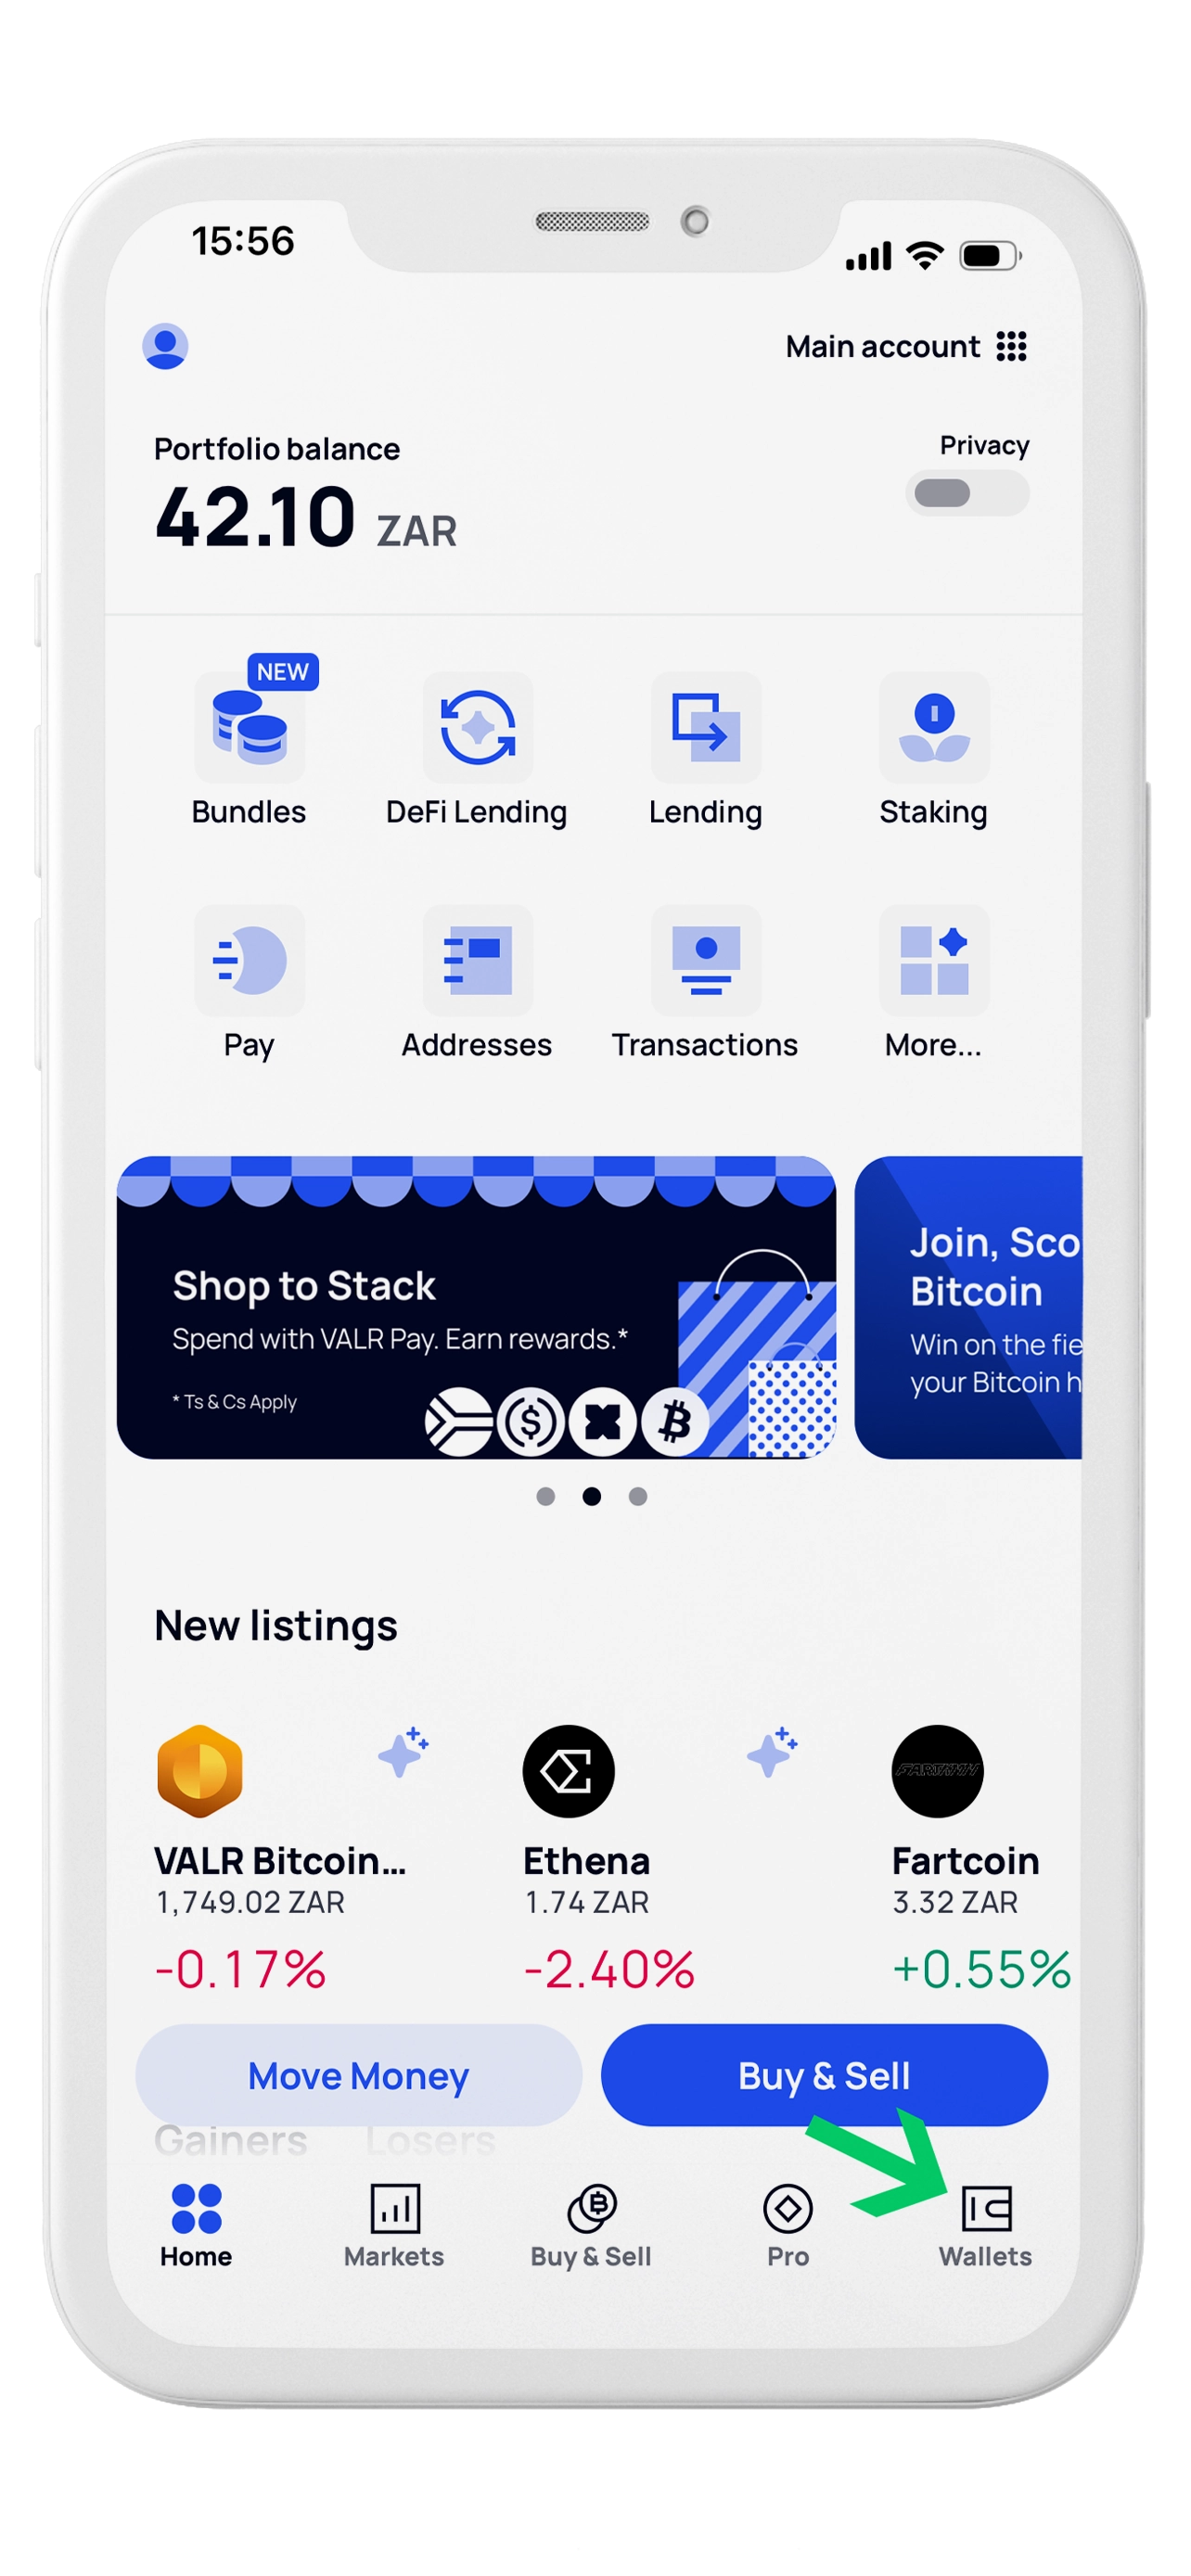
From the VALR home screen, tap Wallets at the bottom to begin the ZAR deposit process.
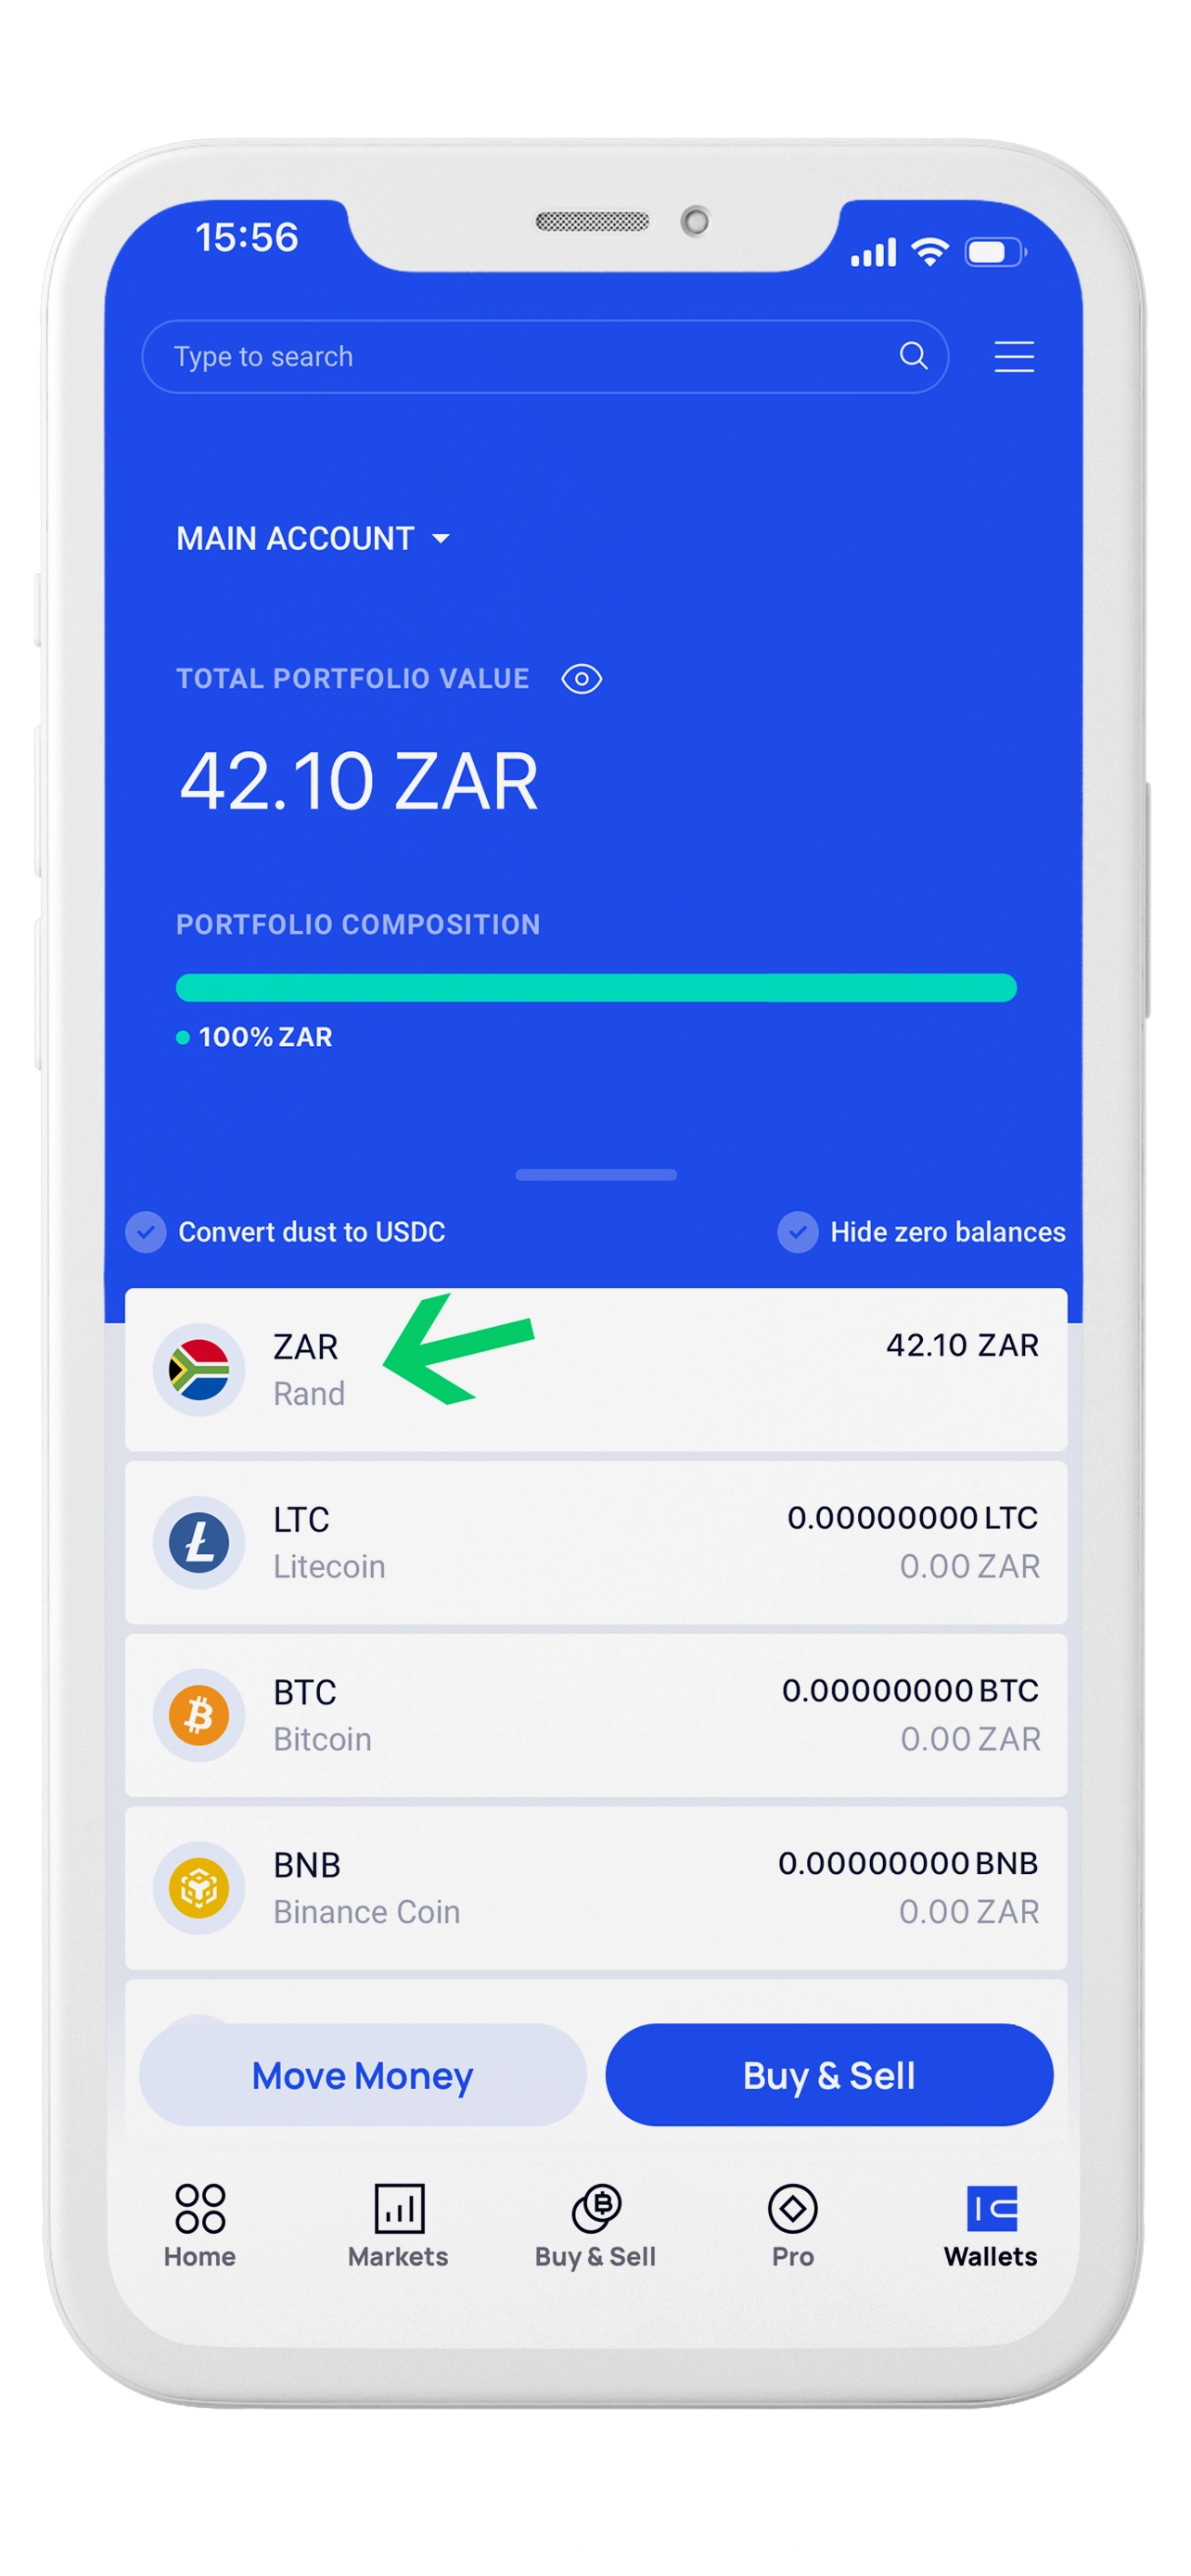
Tap your ZAR / Rand wallet to open your Rand balance page.
Choose Deposit on your ZAR wallet page.
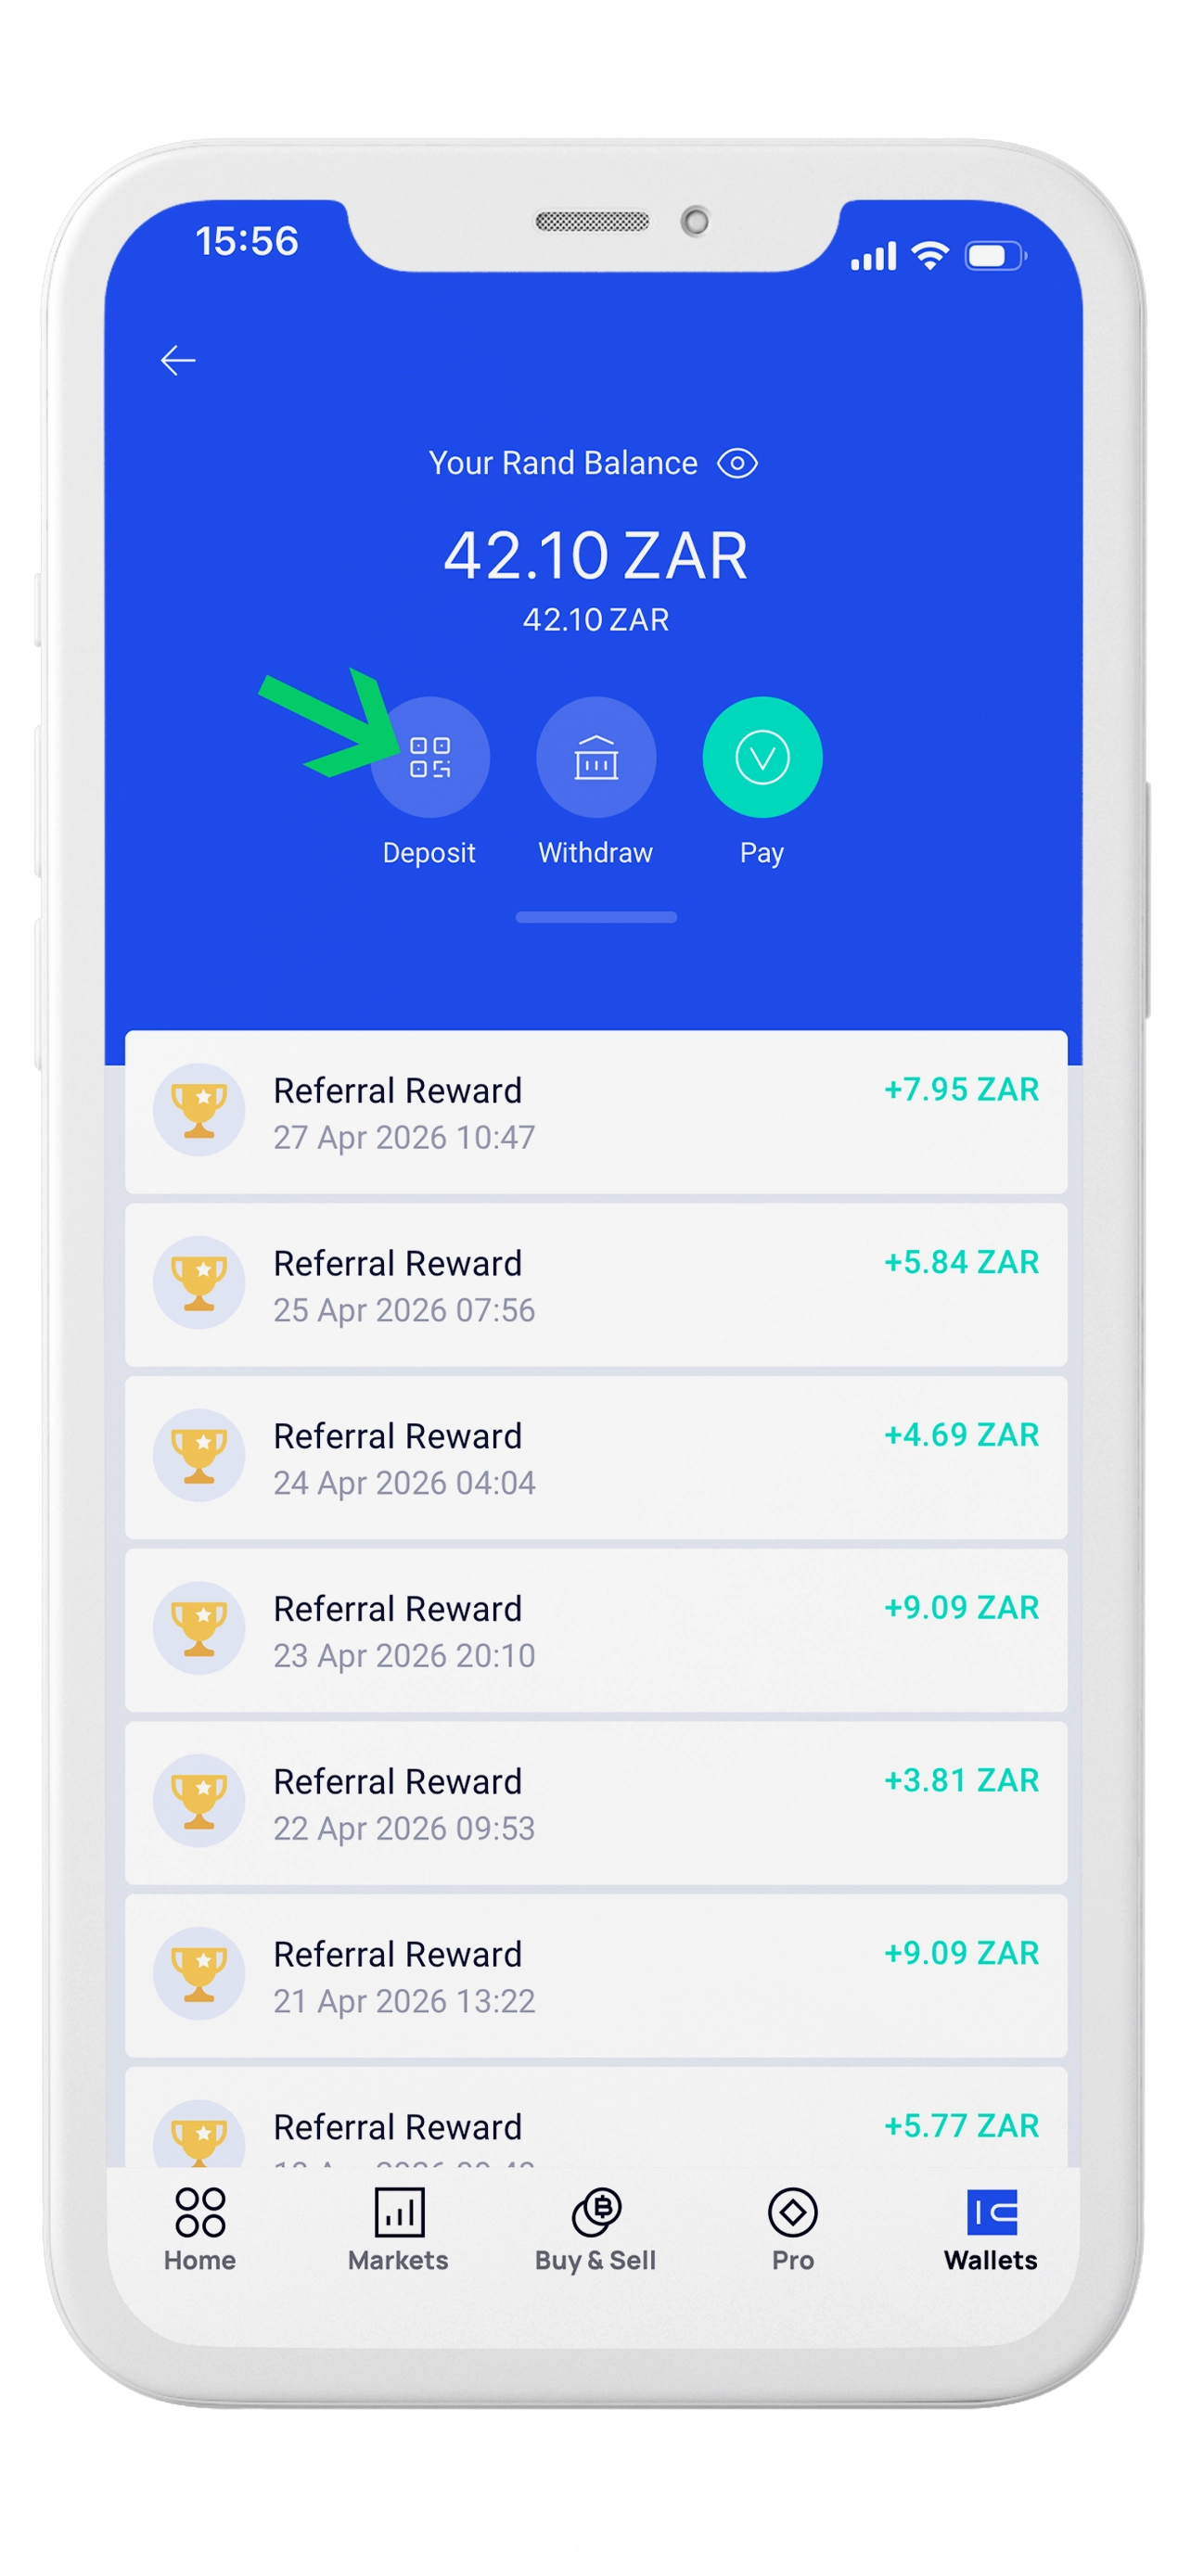
Use VALR’s Fiat Deposit details: recipient, bank, account number, branch code, and your unique reference.
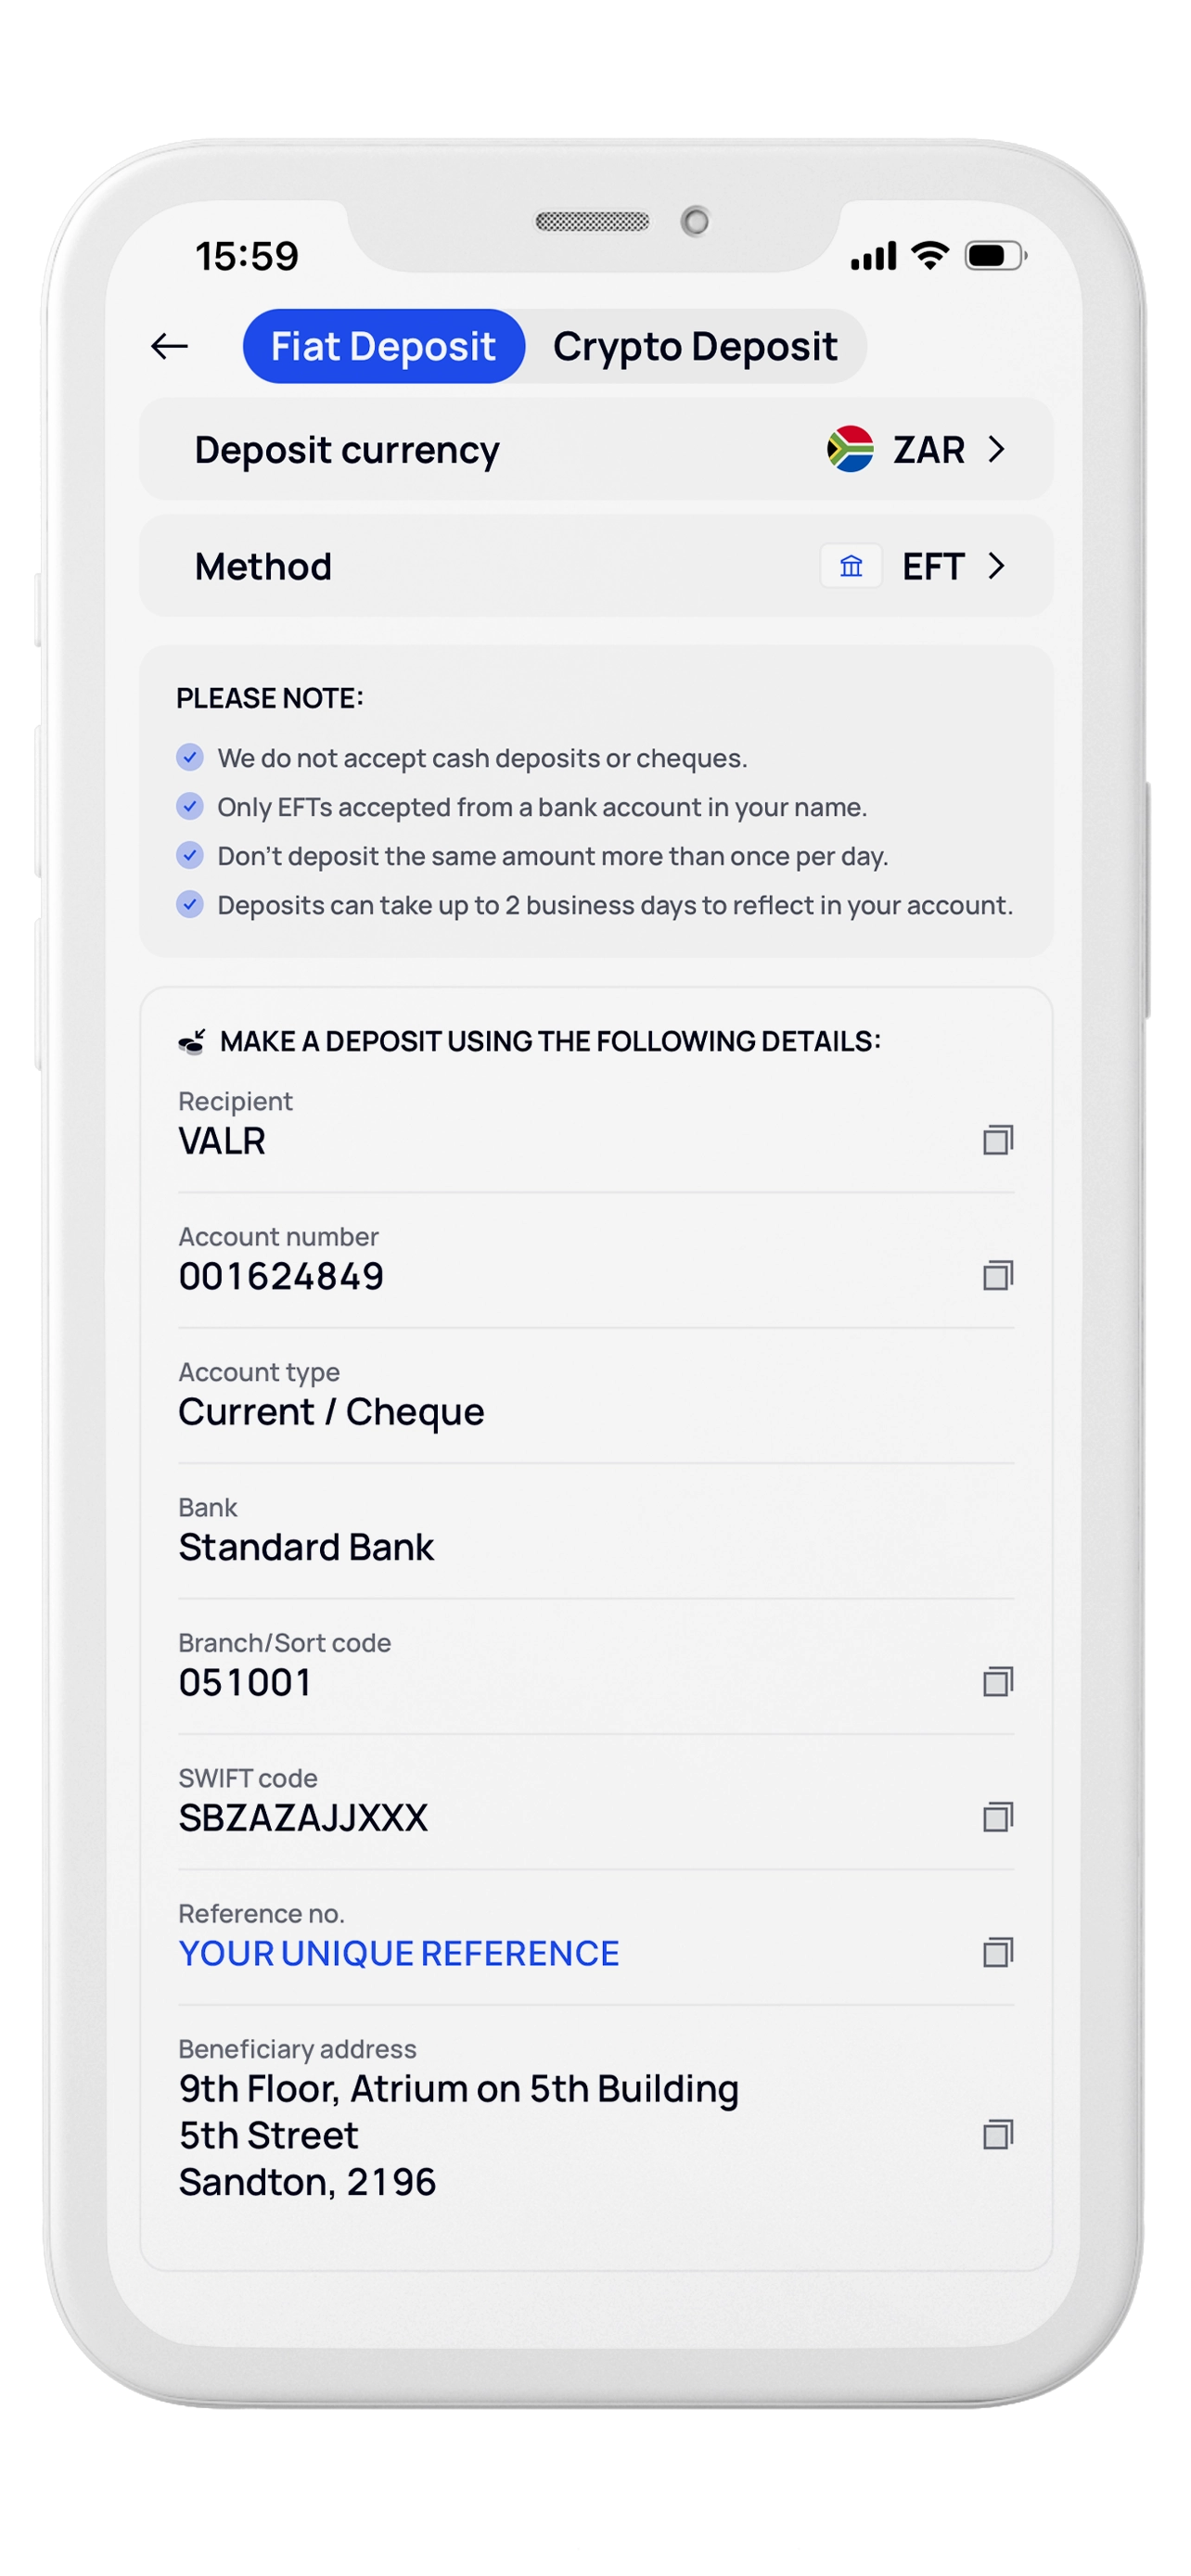
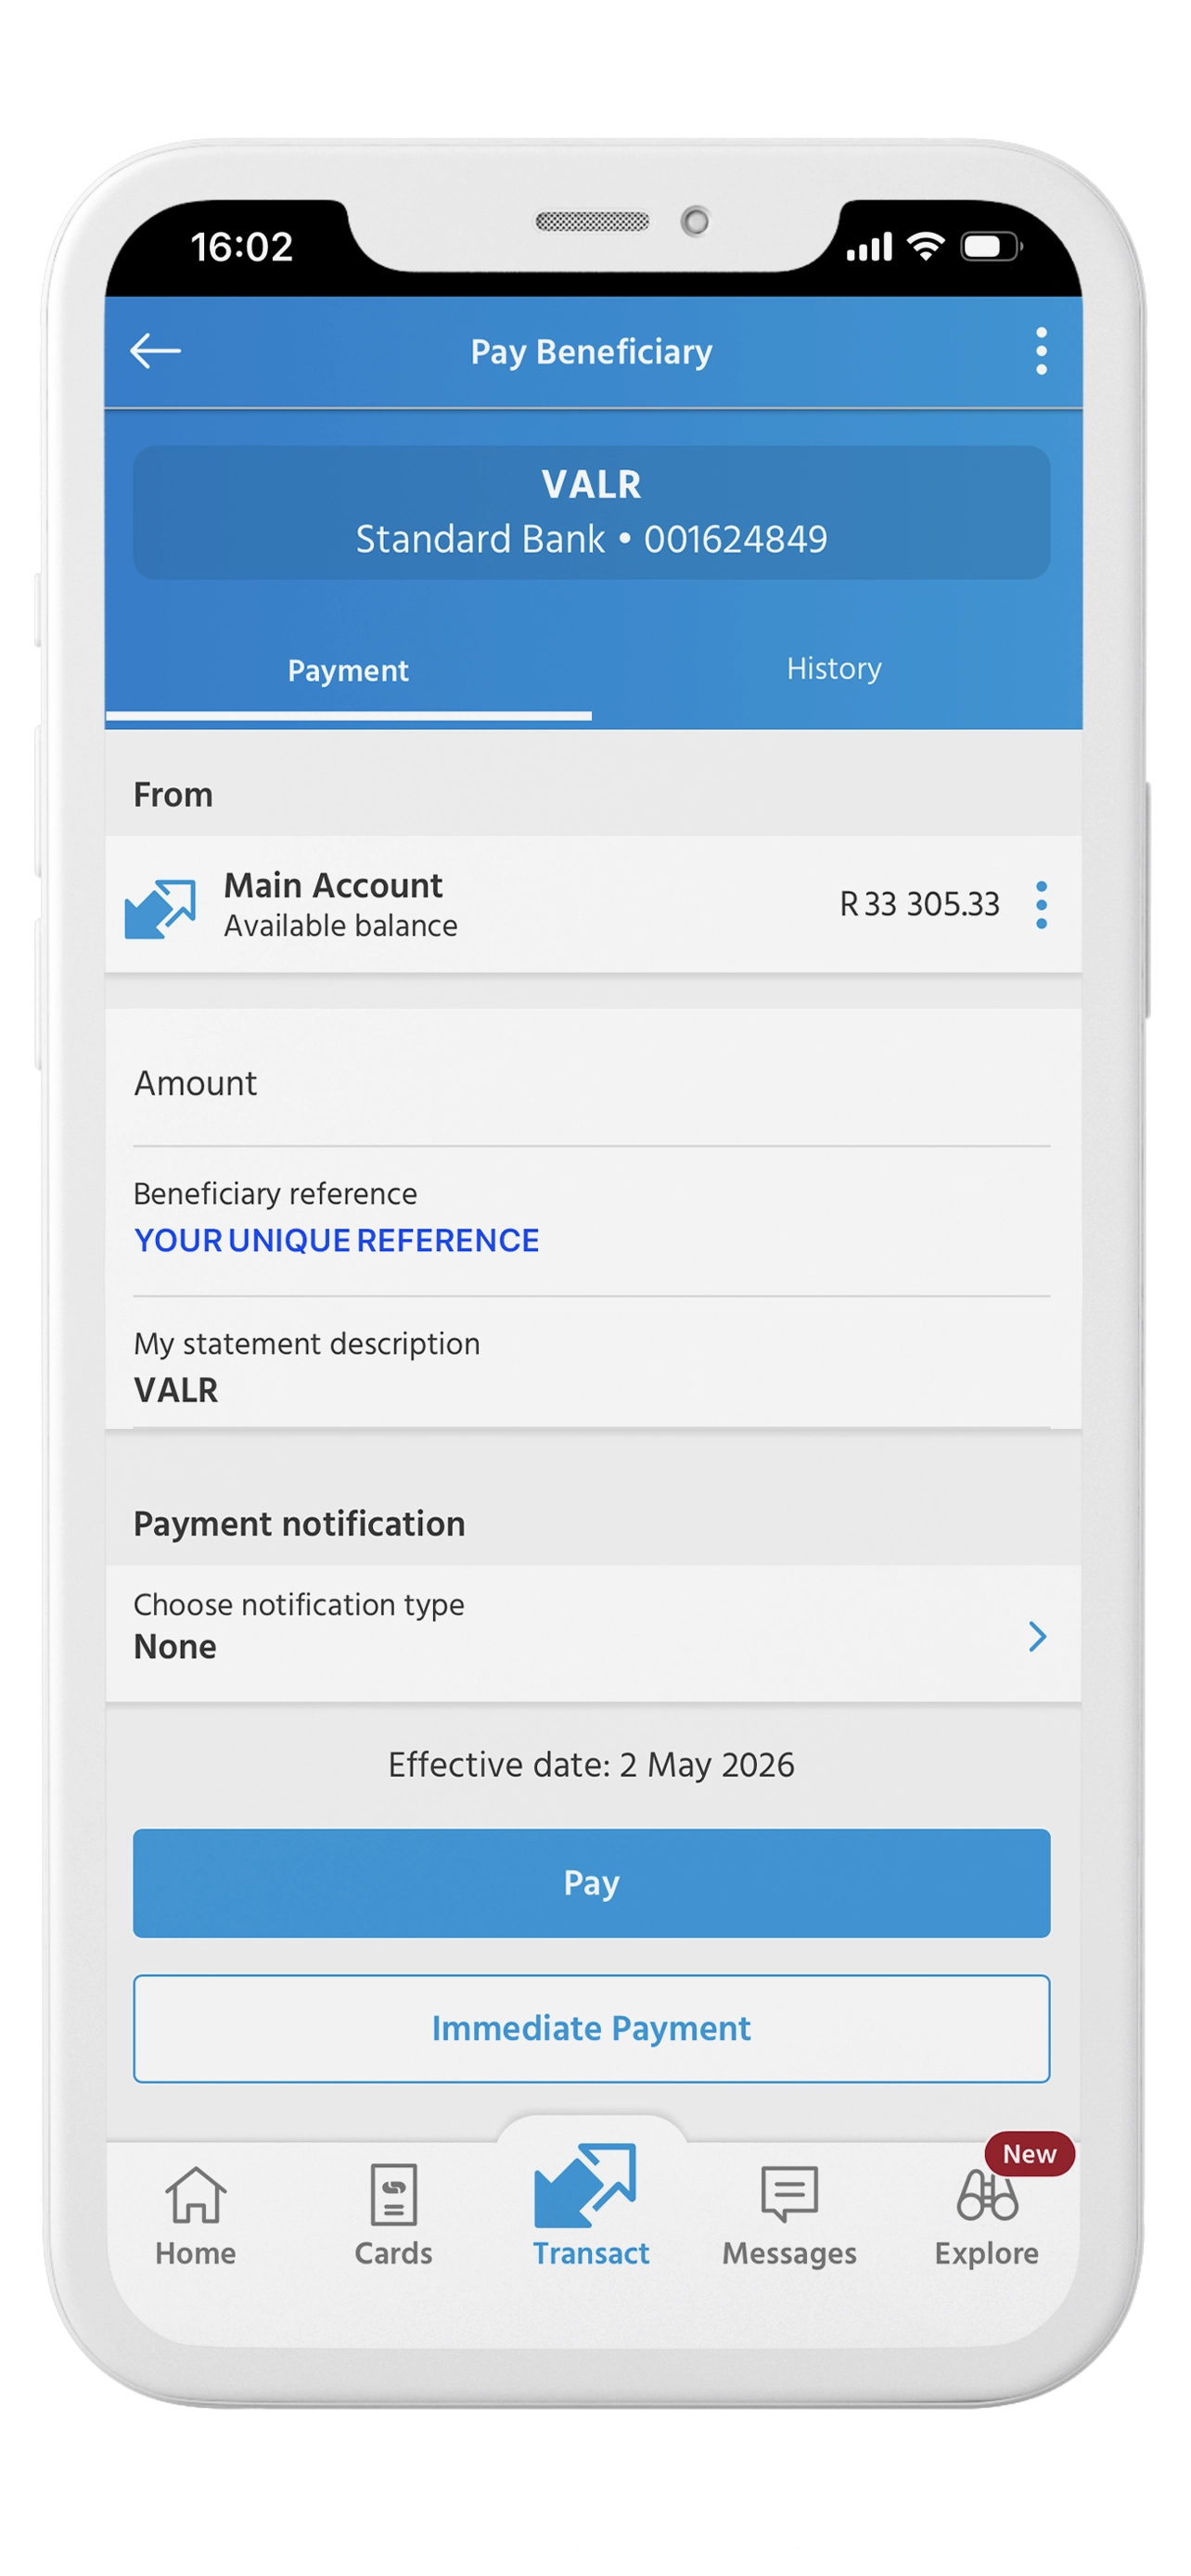
In your banking app, pay the VALR beneficiary and paste your unique VALR reference into the beneficiary reference field.
Once the EFT clears, your VALR balance updates and you can now buy USDT. Tap the Buy/Sell button at the bottom to start purchasing USDT.
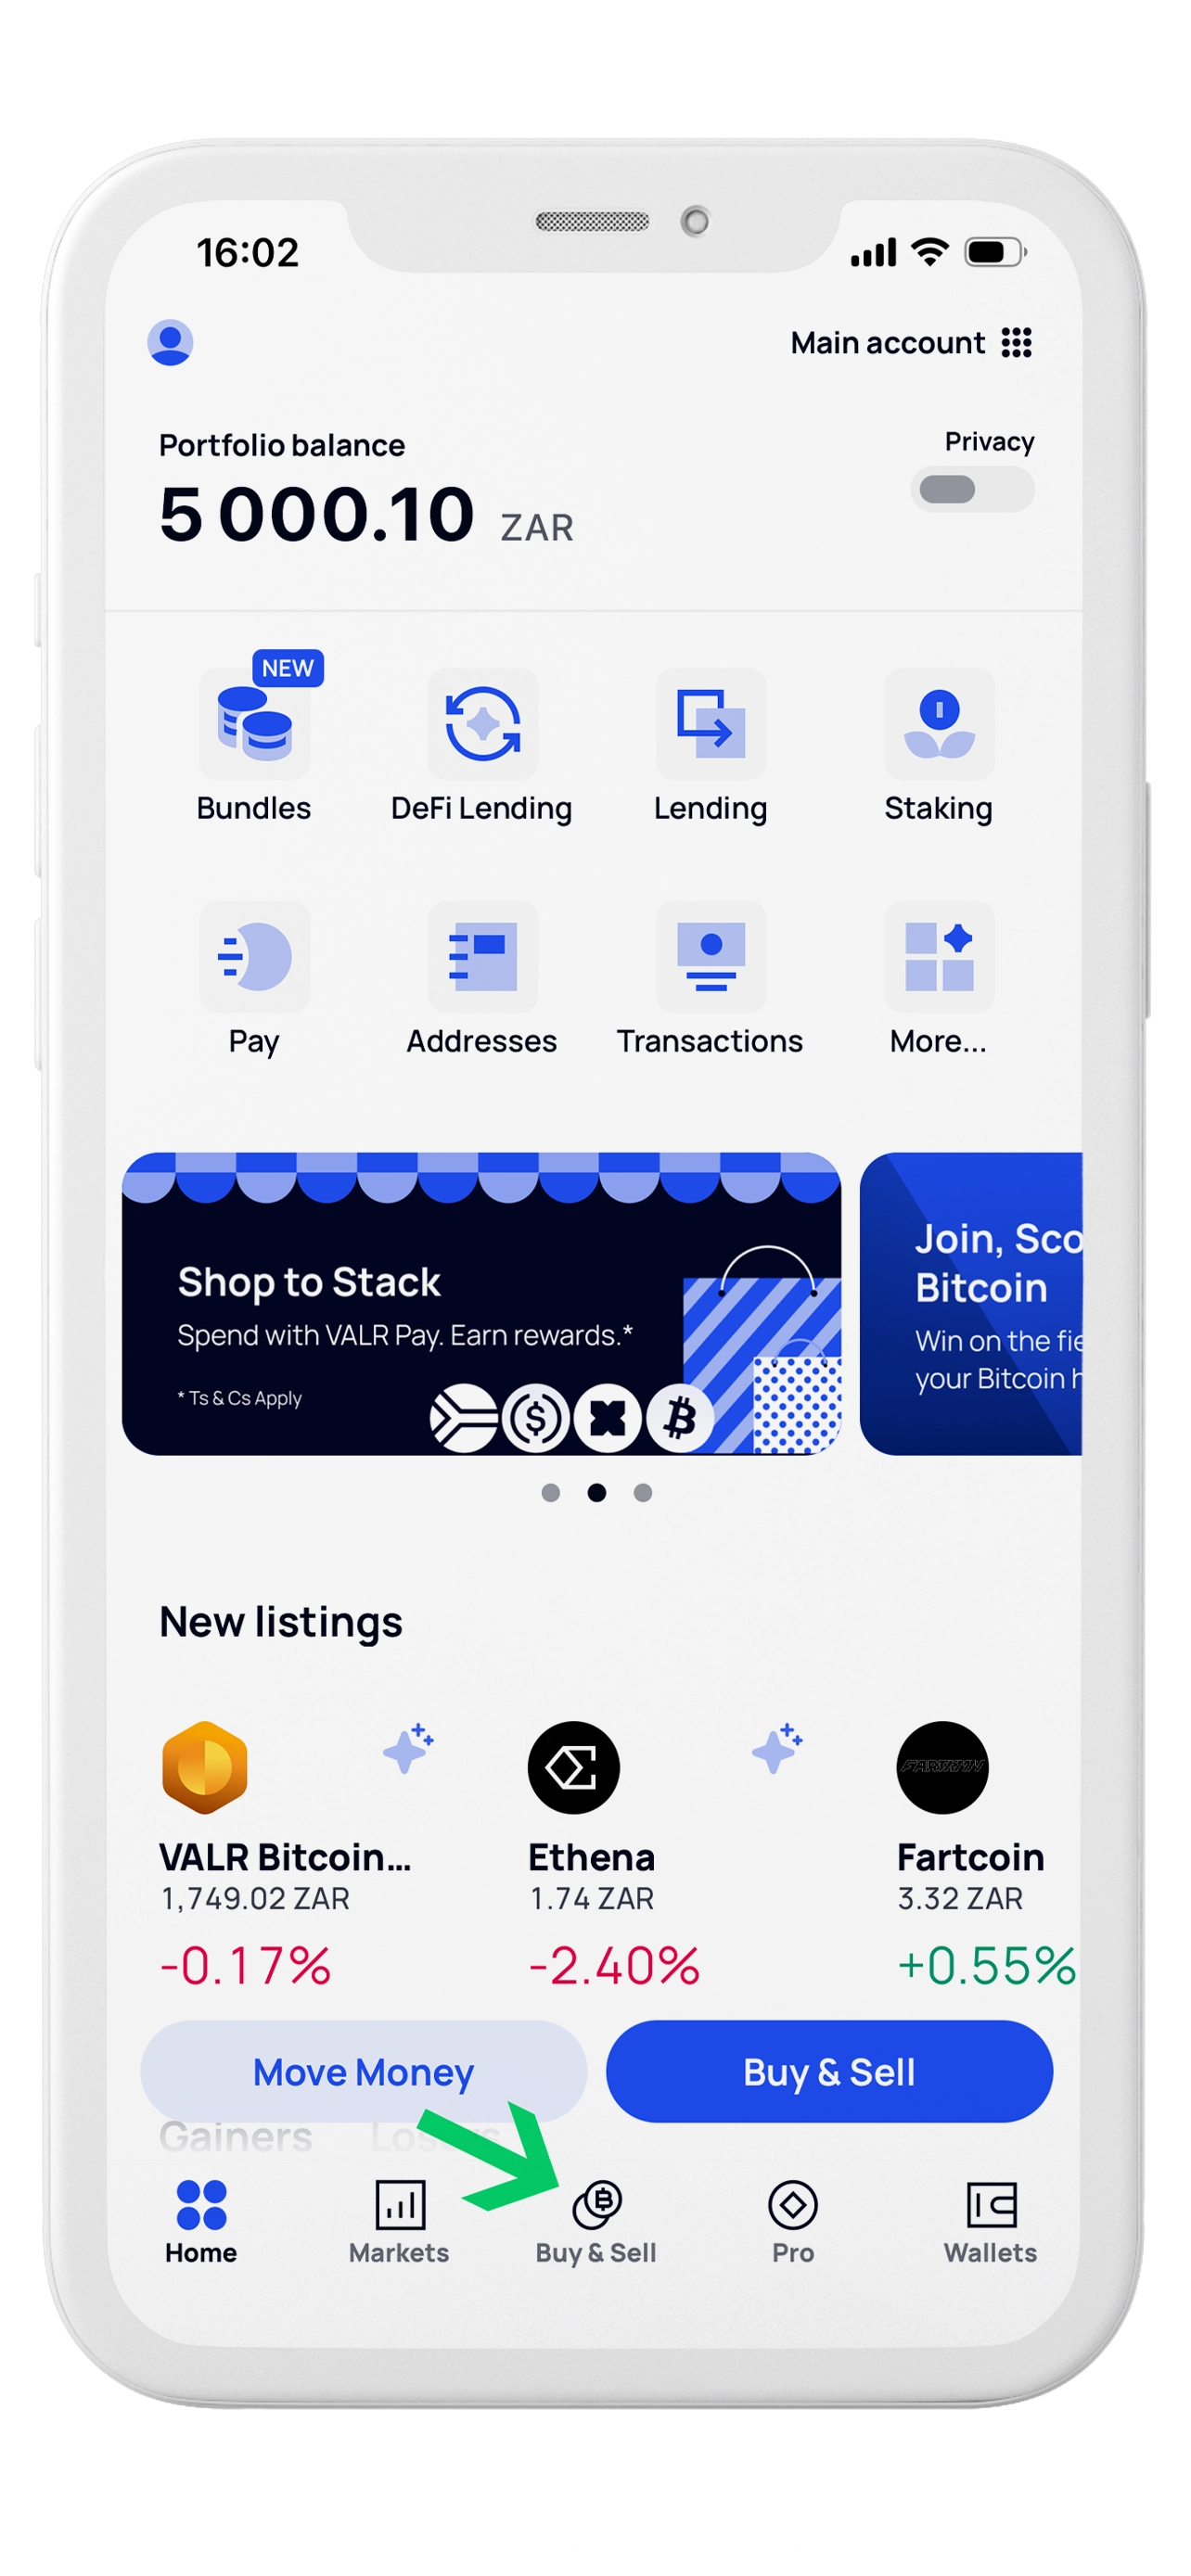
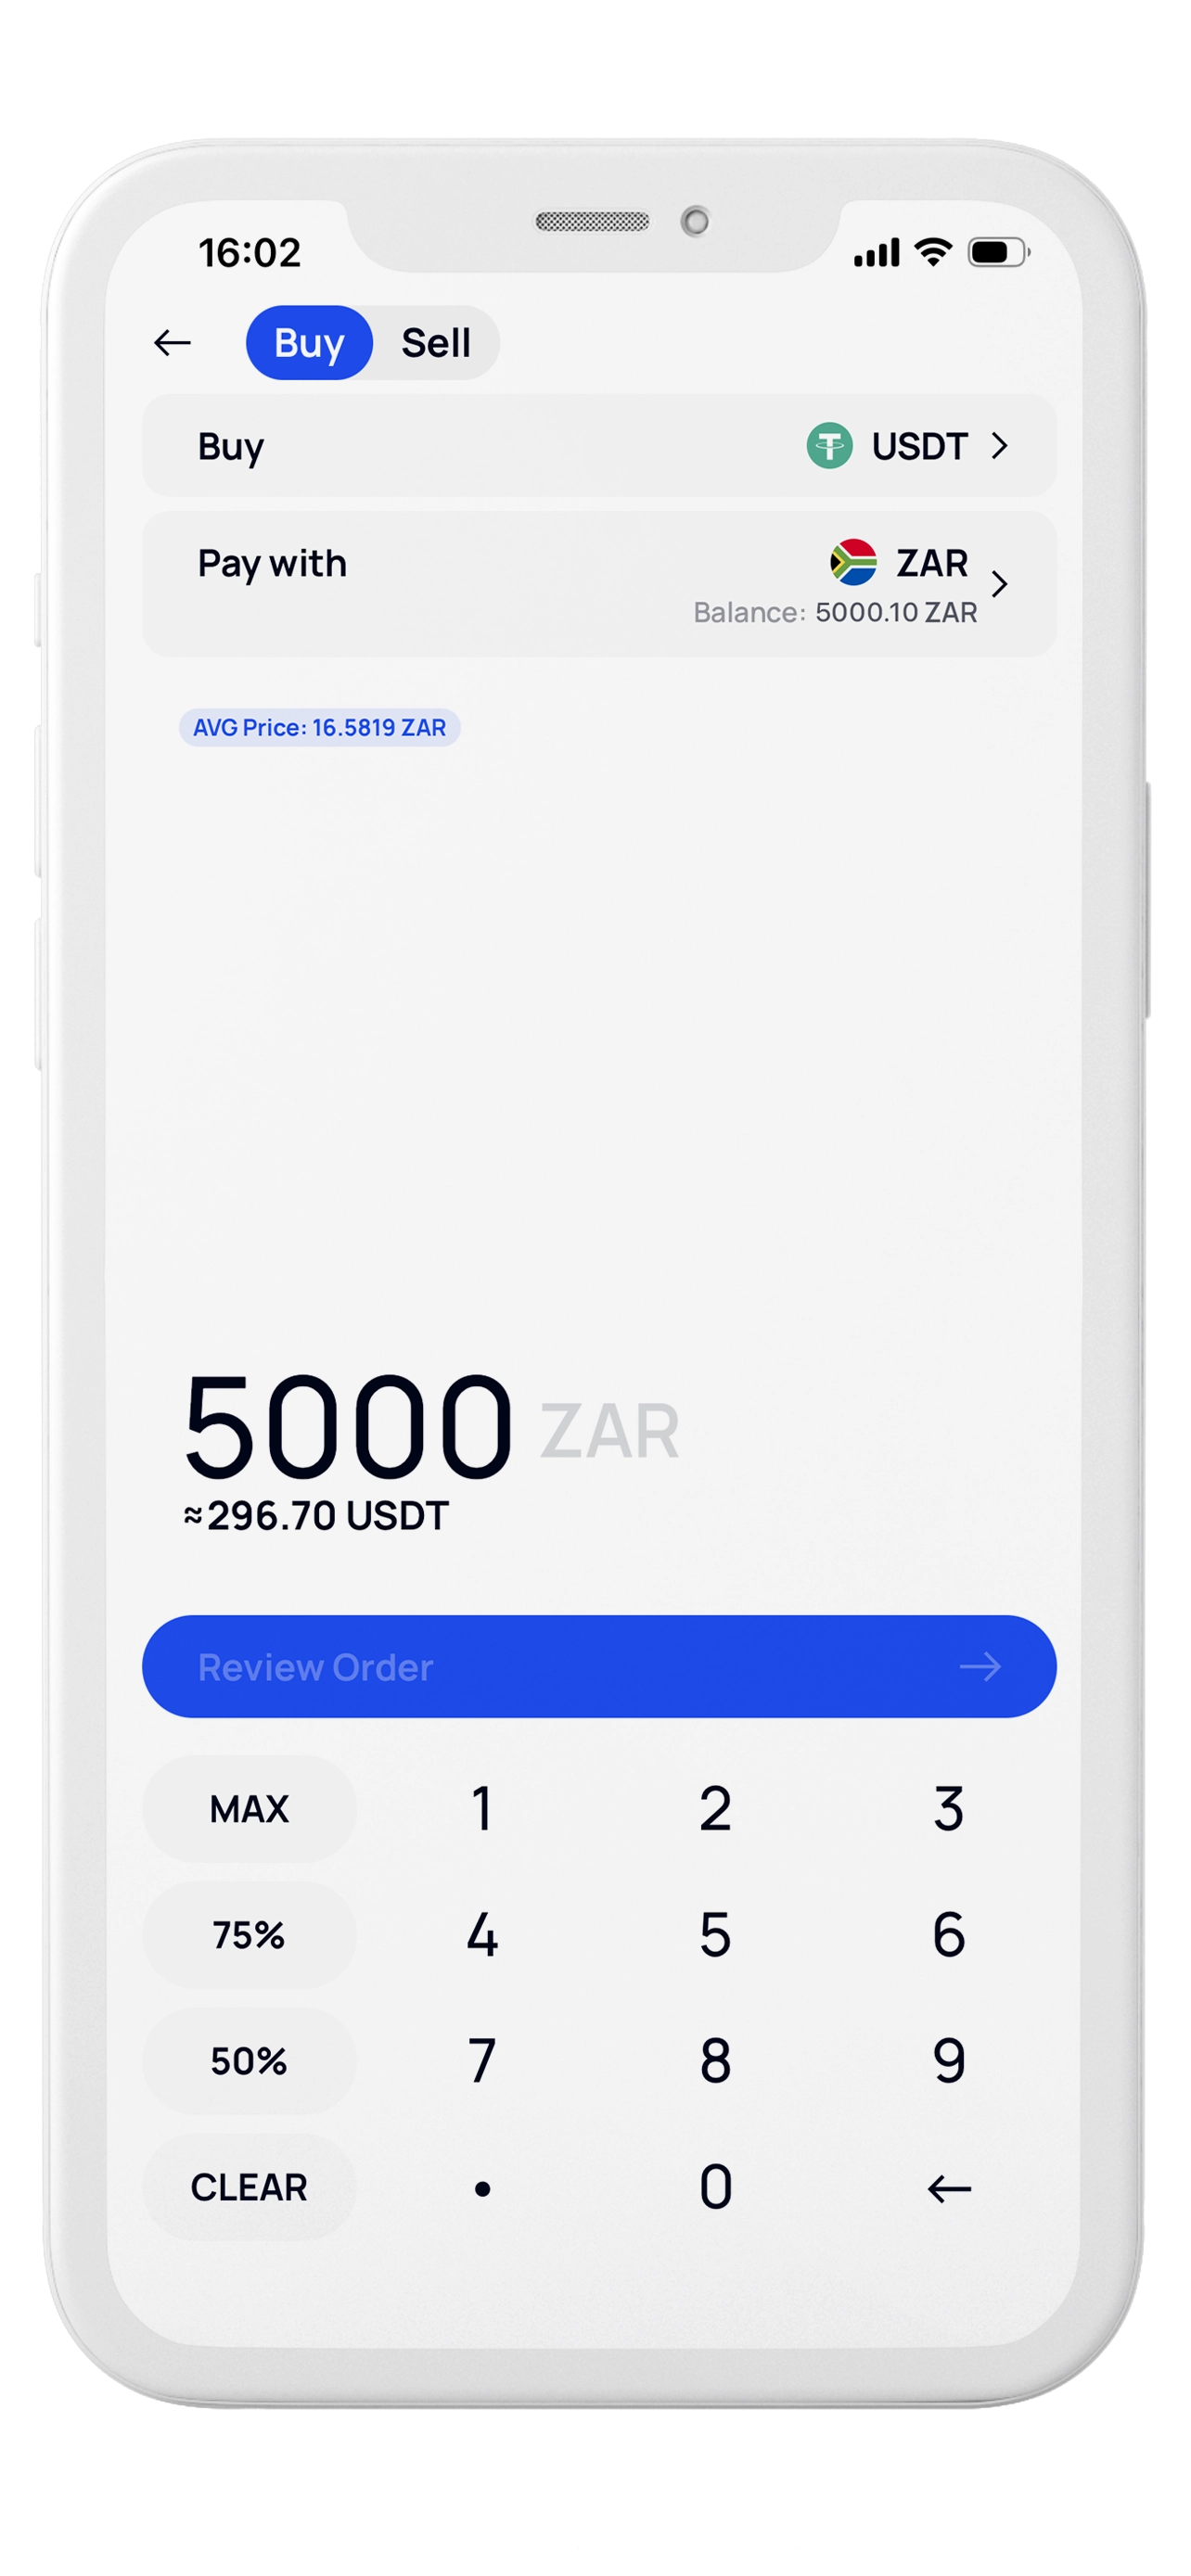
Tap Buy, select USDT, pay with ZAR, enter the amount, review the order, and confirm.
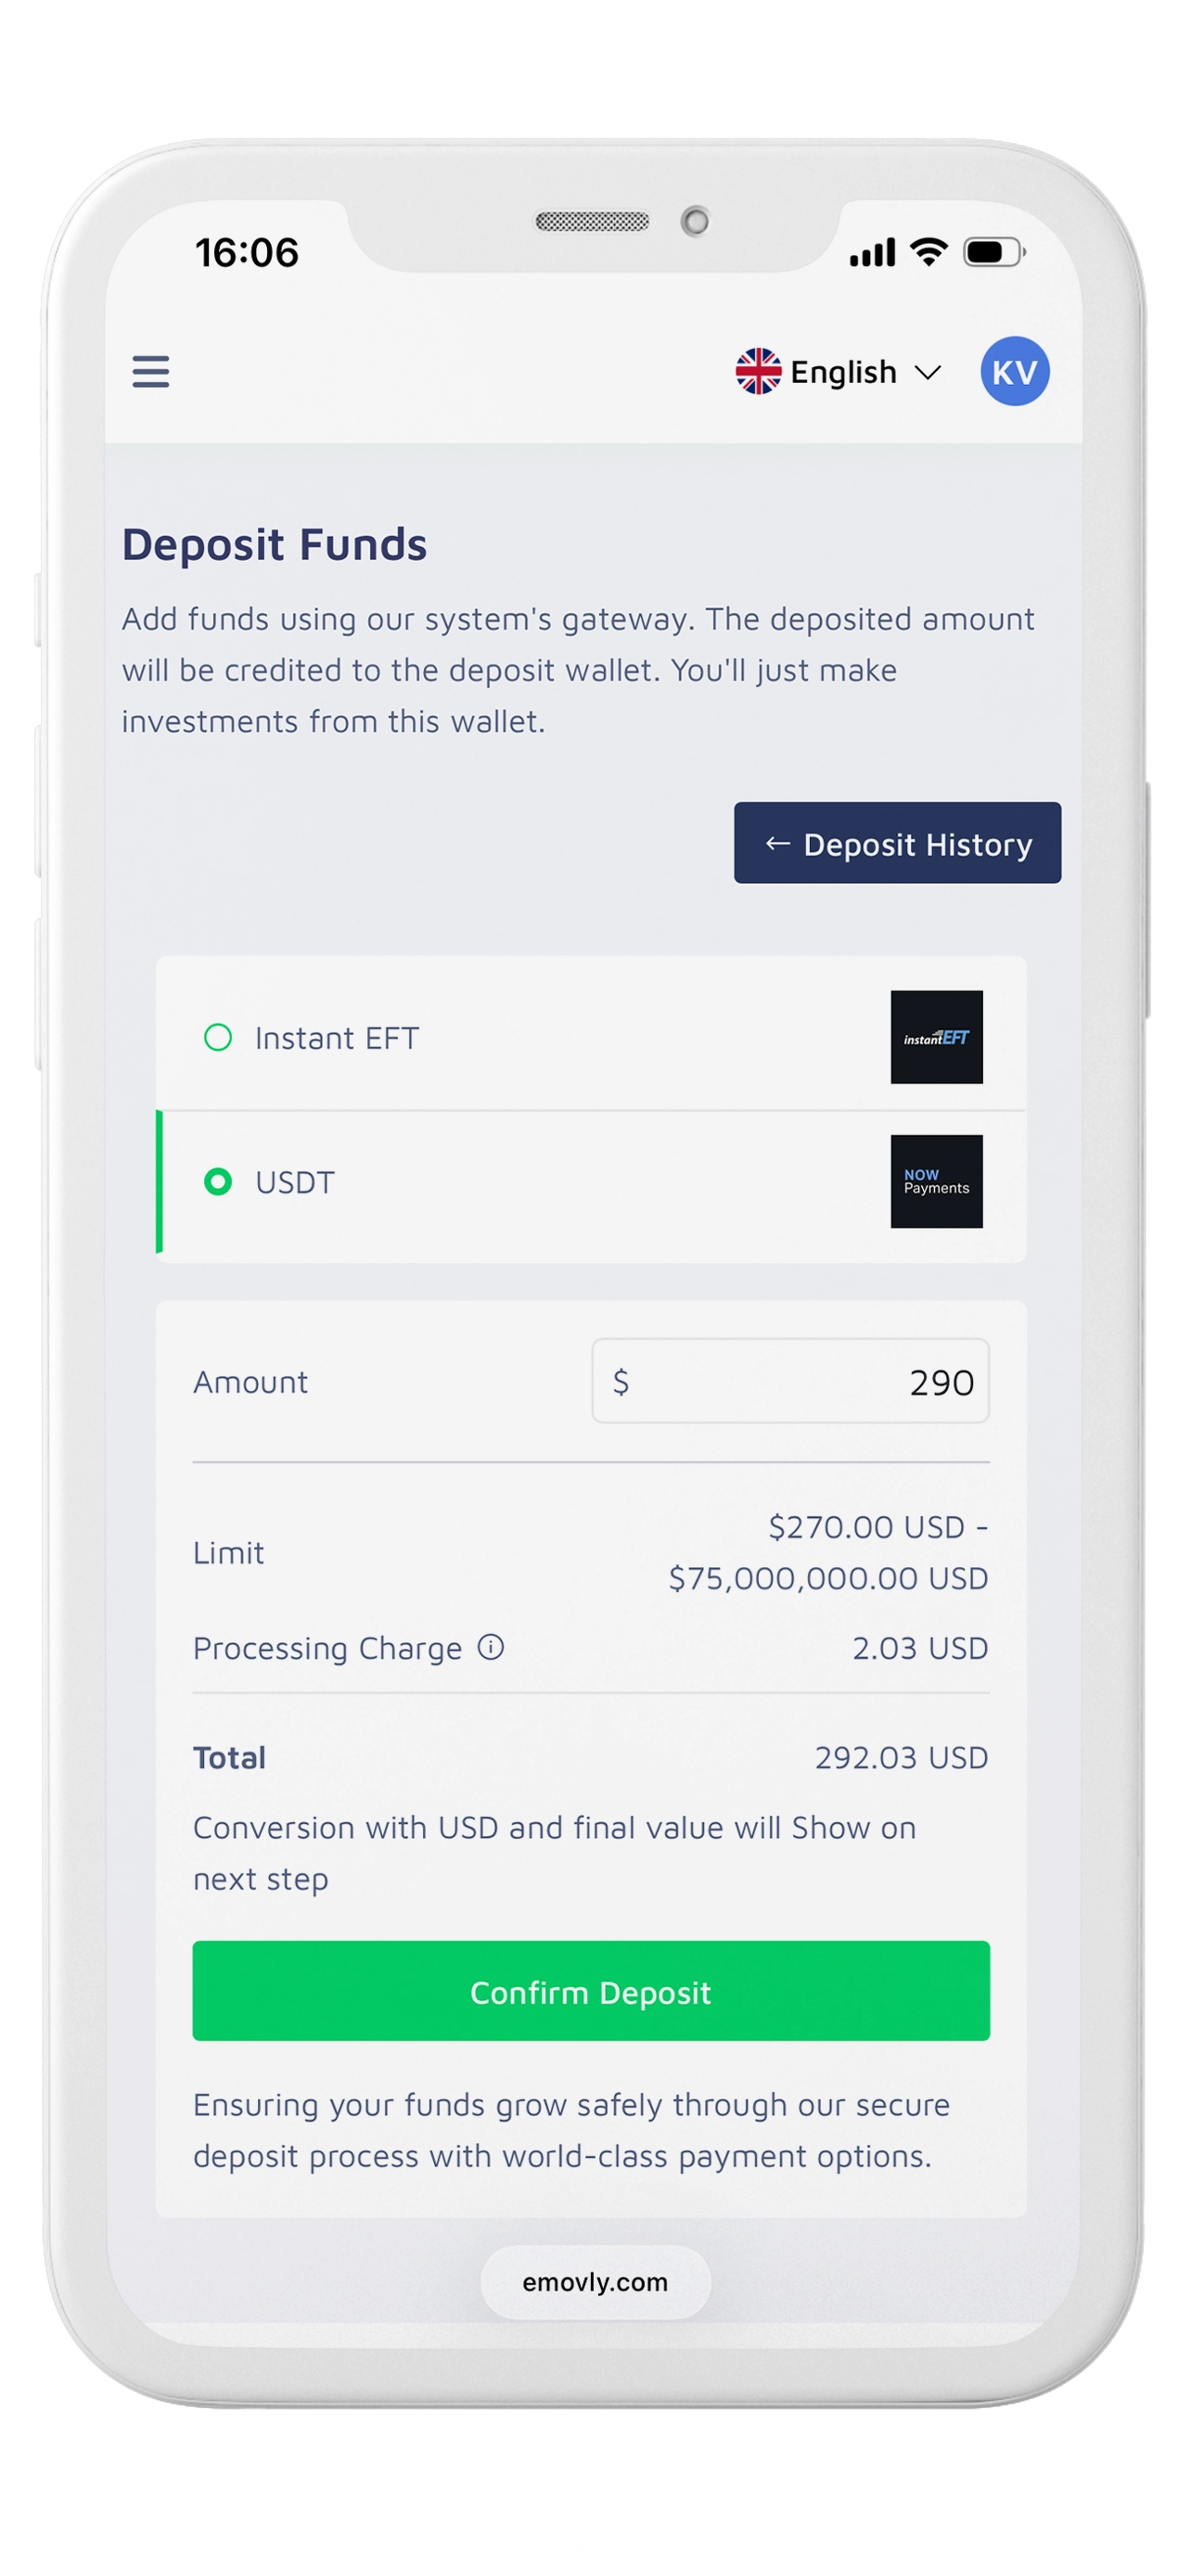
Log in to your eMovly account, open Deposit Funds, choose USDT, enter the amount you want to fund, and confirm.
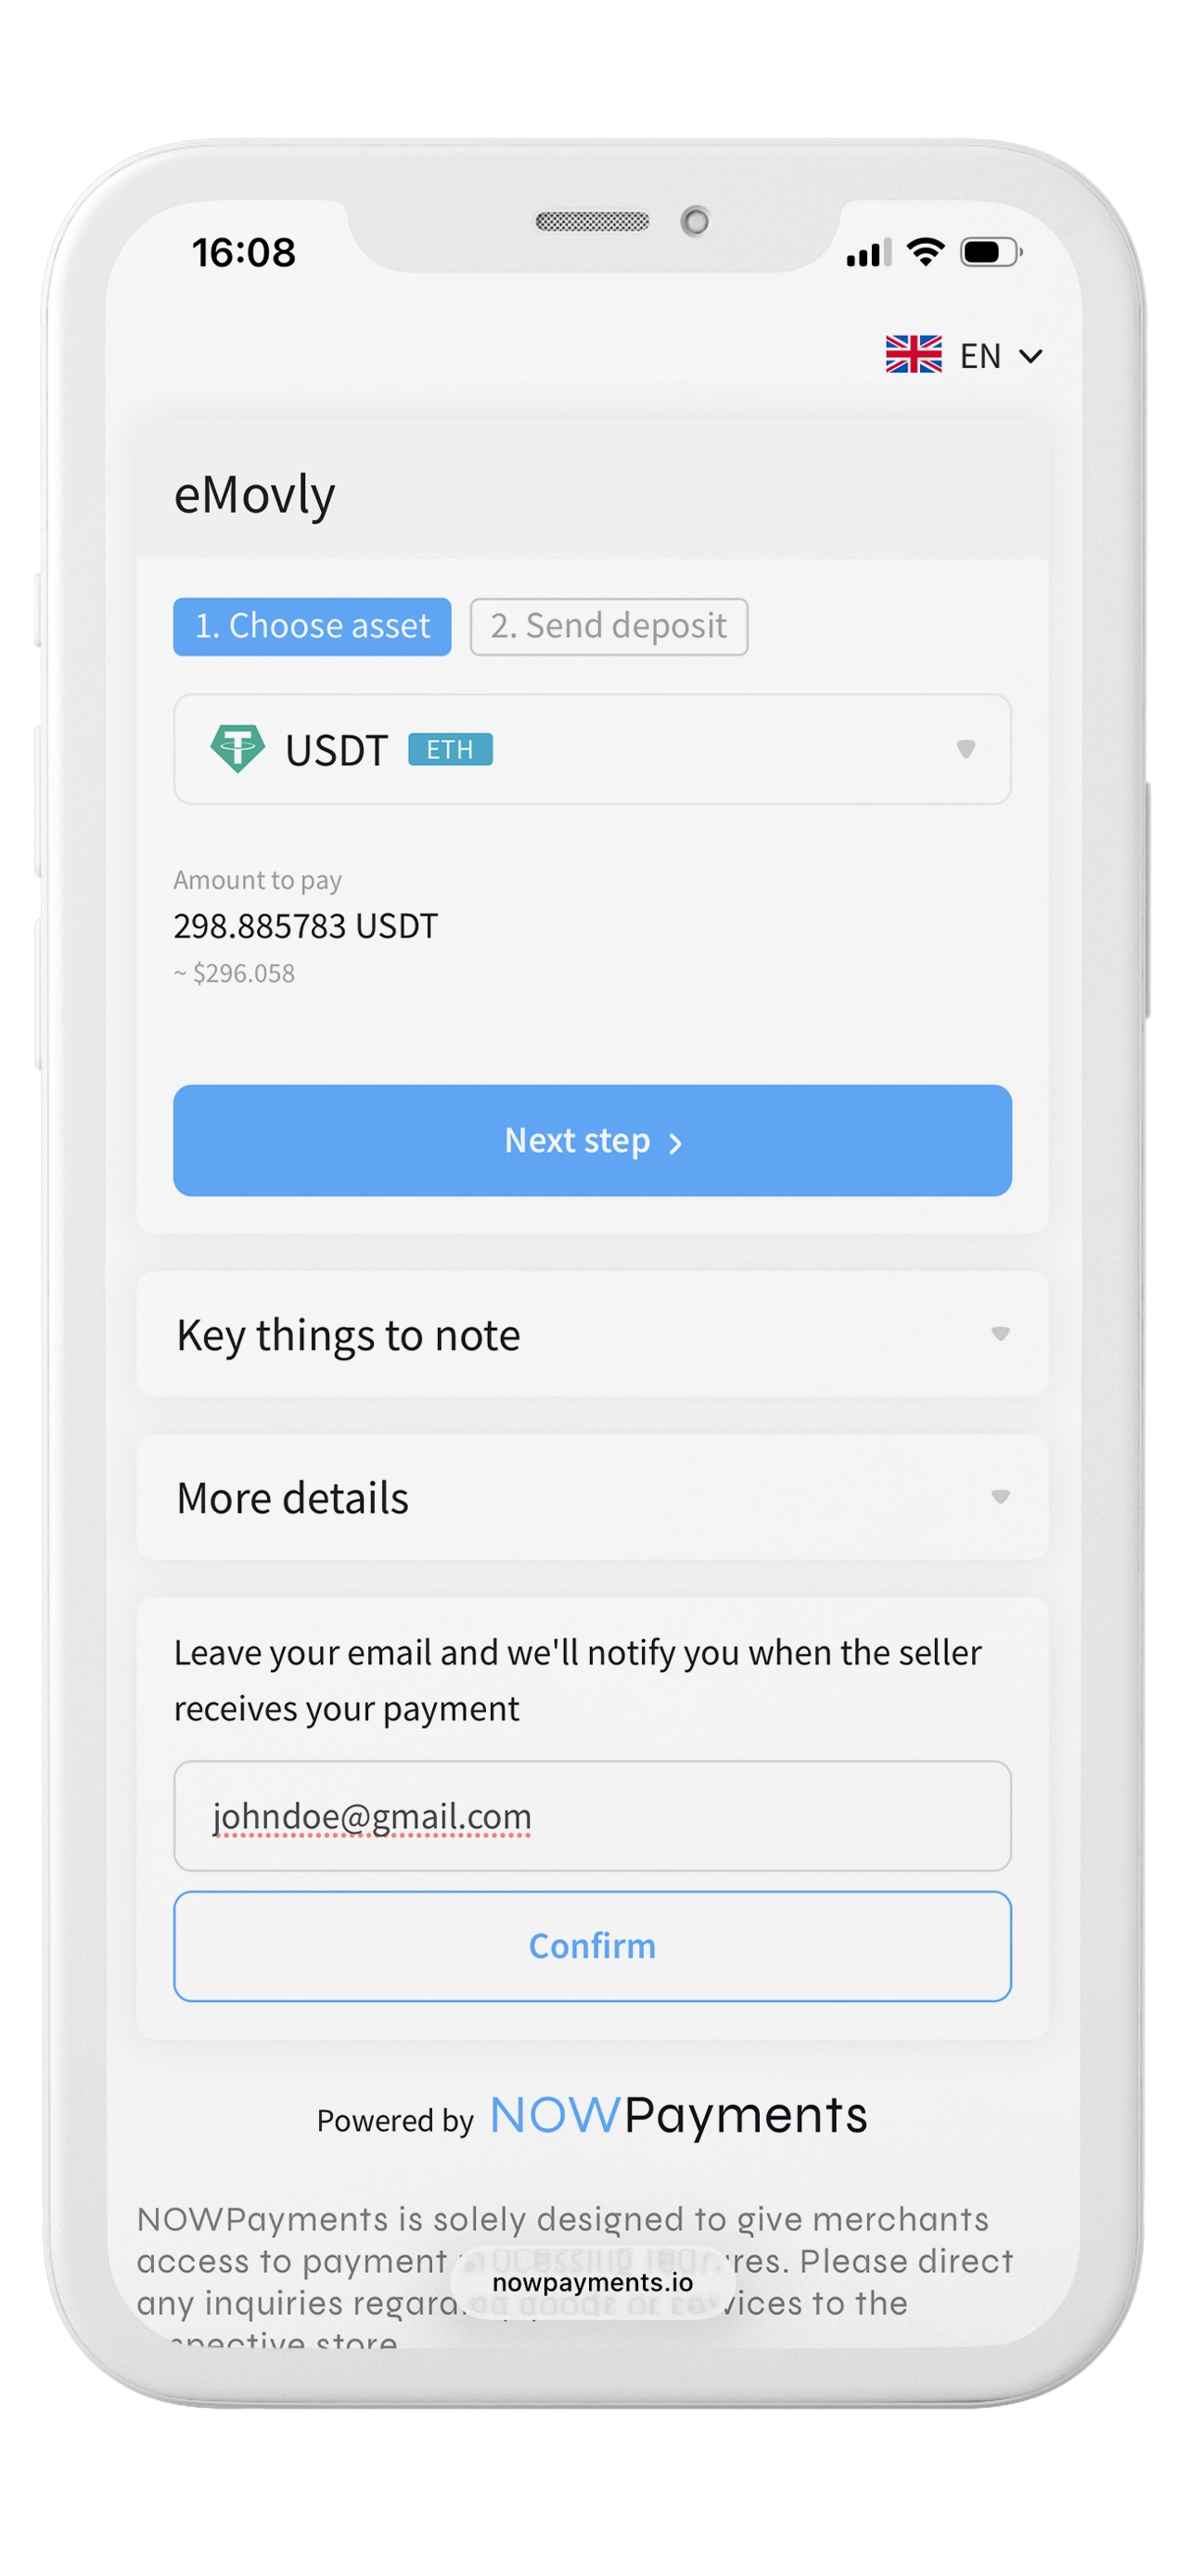
On the payment screen, select USDT. Make sure you only use the ETH (ERC-20) network, using any other network will result in lost funds.
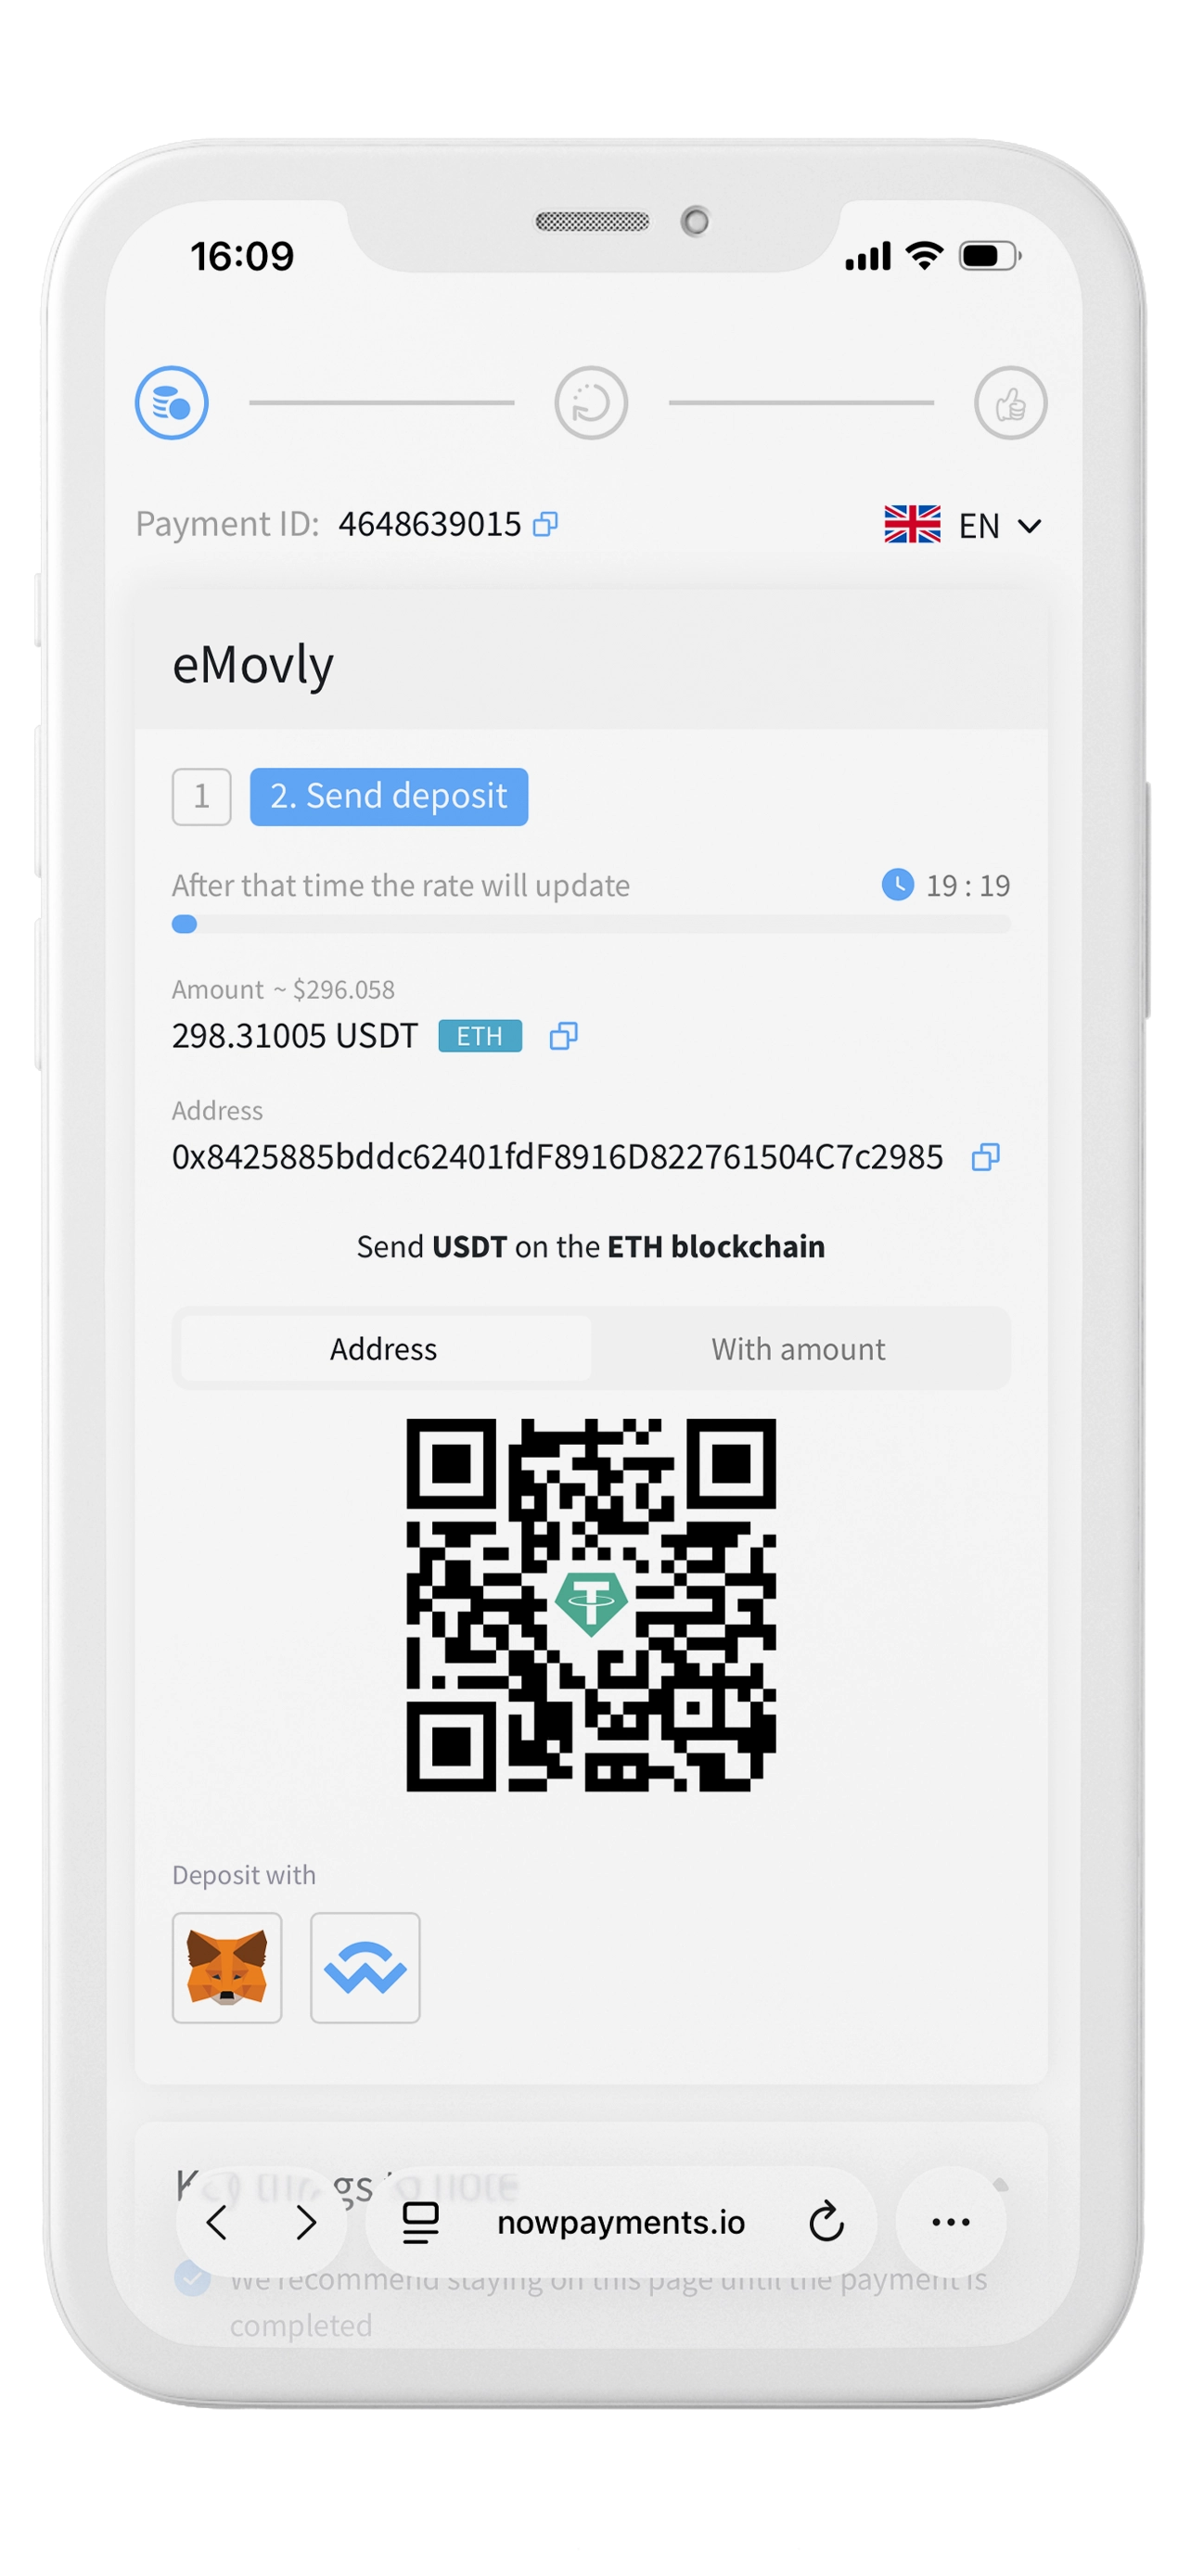
Copy the eMovly USDT deposit address and the exact amount shown by the payment gateway.
Return to VALR, open your USDT wallet, and tap Withdraw.
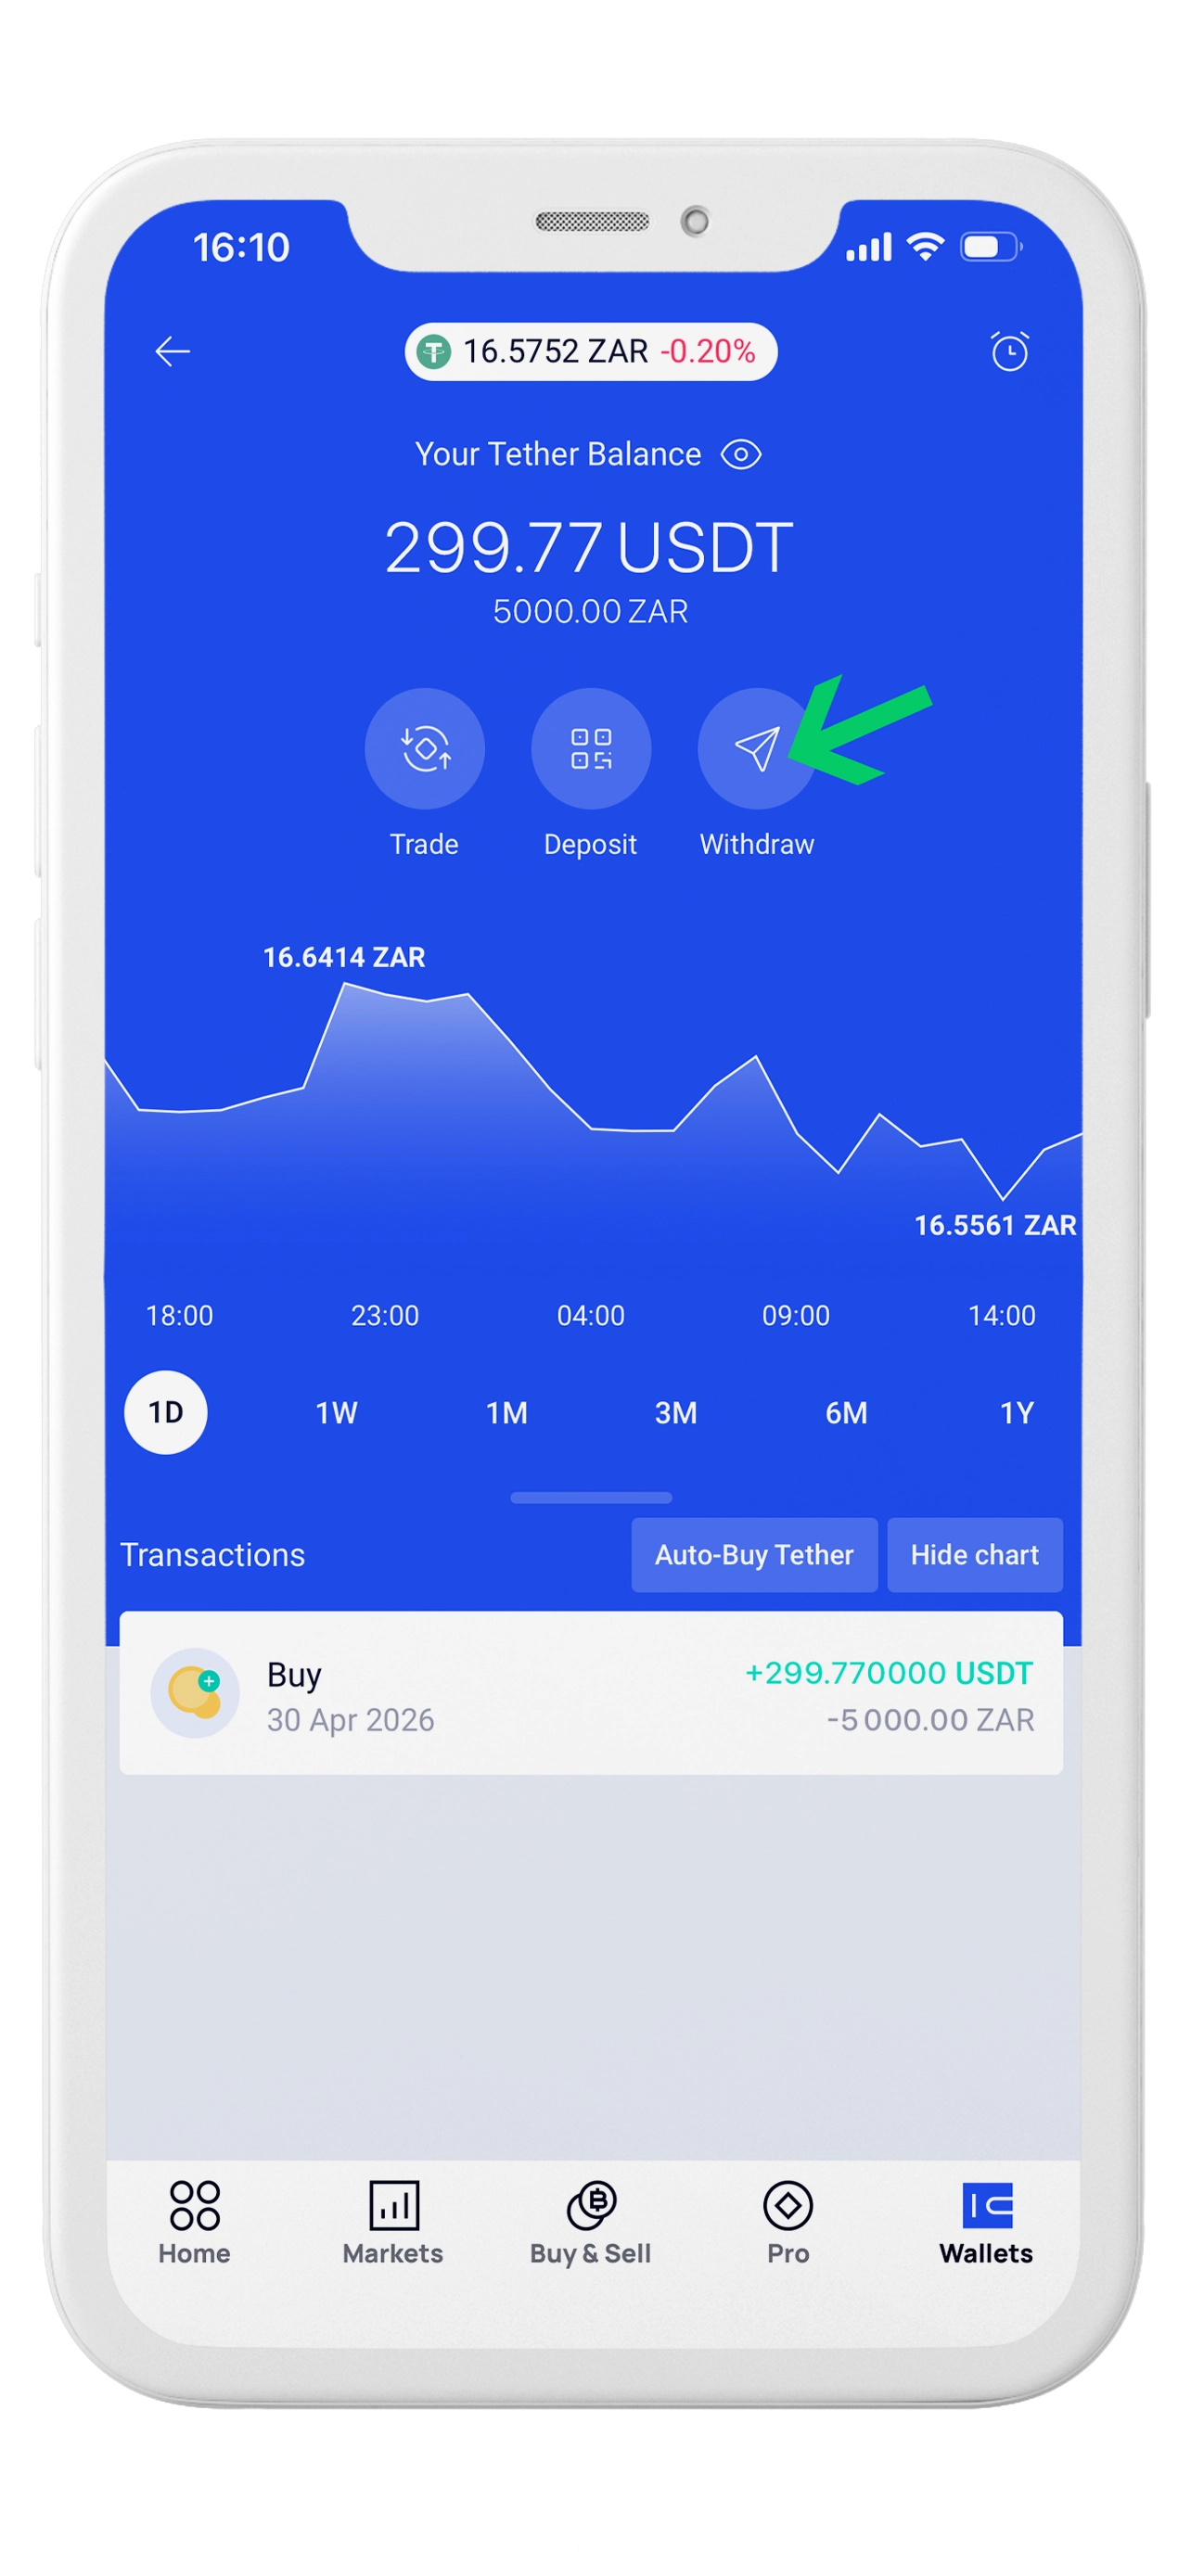
Paste the eMovly address, select Ethereum (ETH) as the withdrawal network, and enter the amount shown by eMovly.
Review the address, network, amount, fee, and total. Tap Confirm Withdrawal and complete security approval.
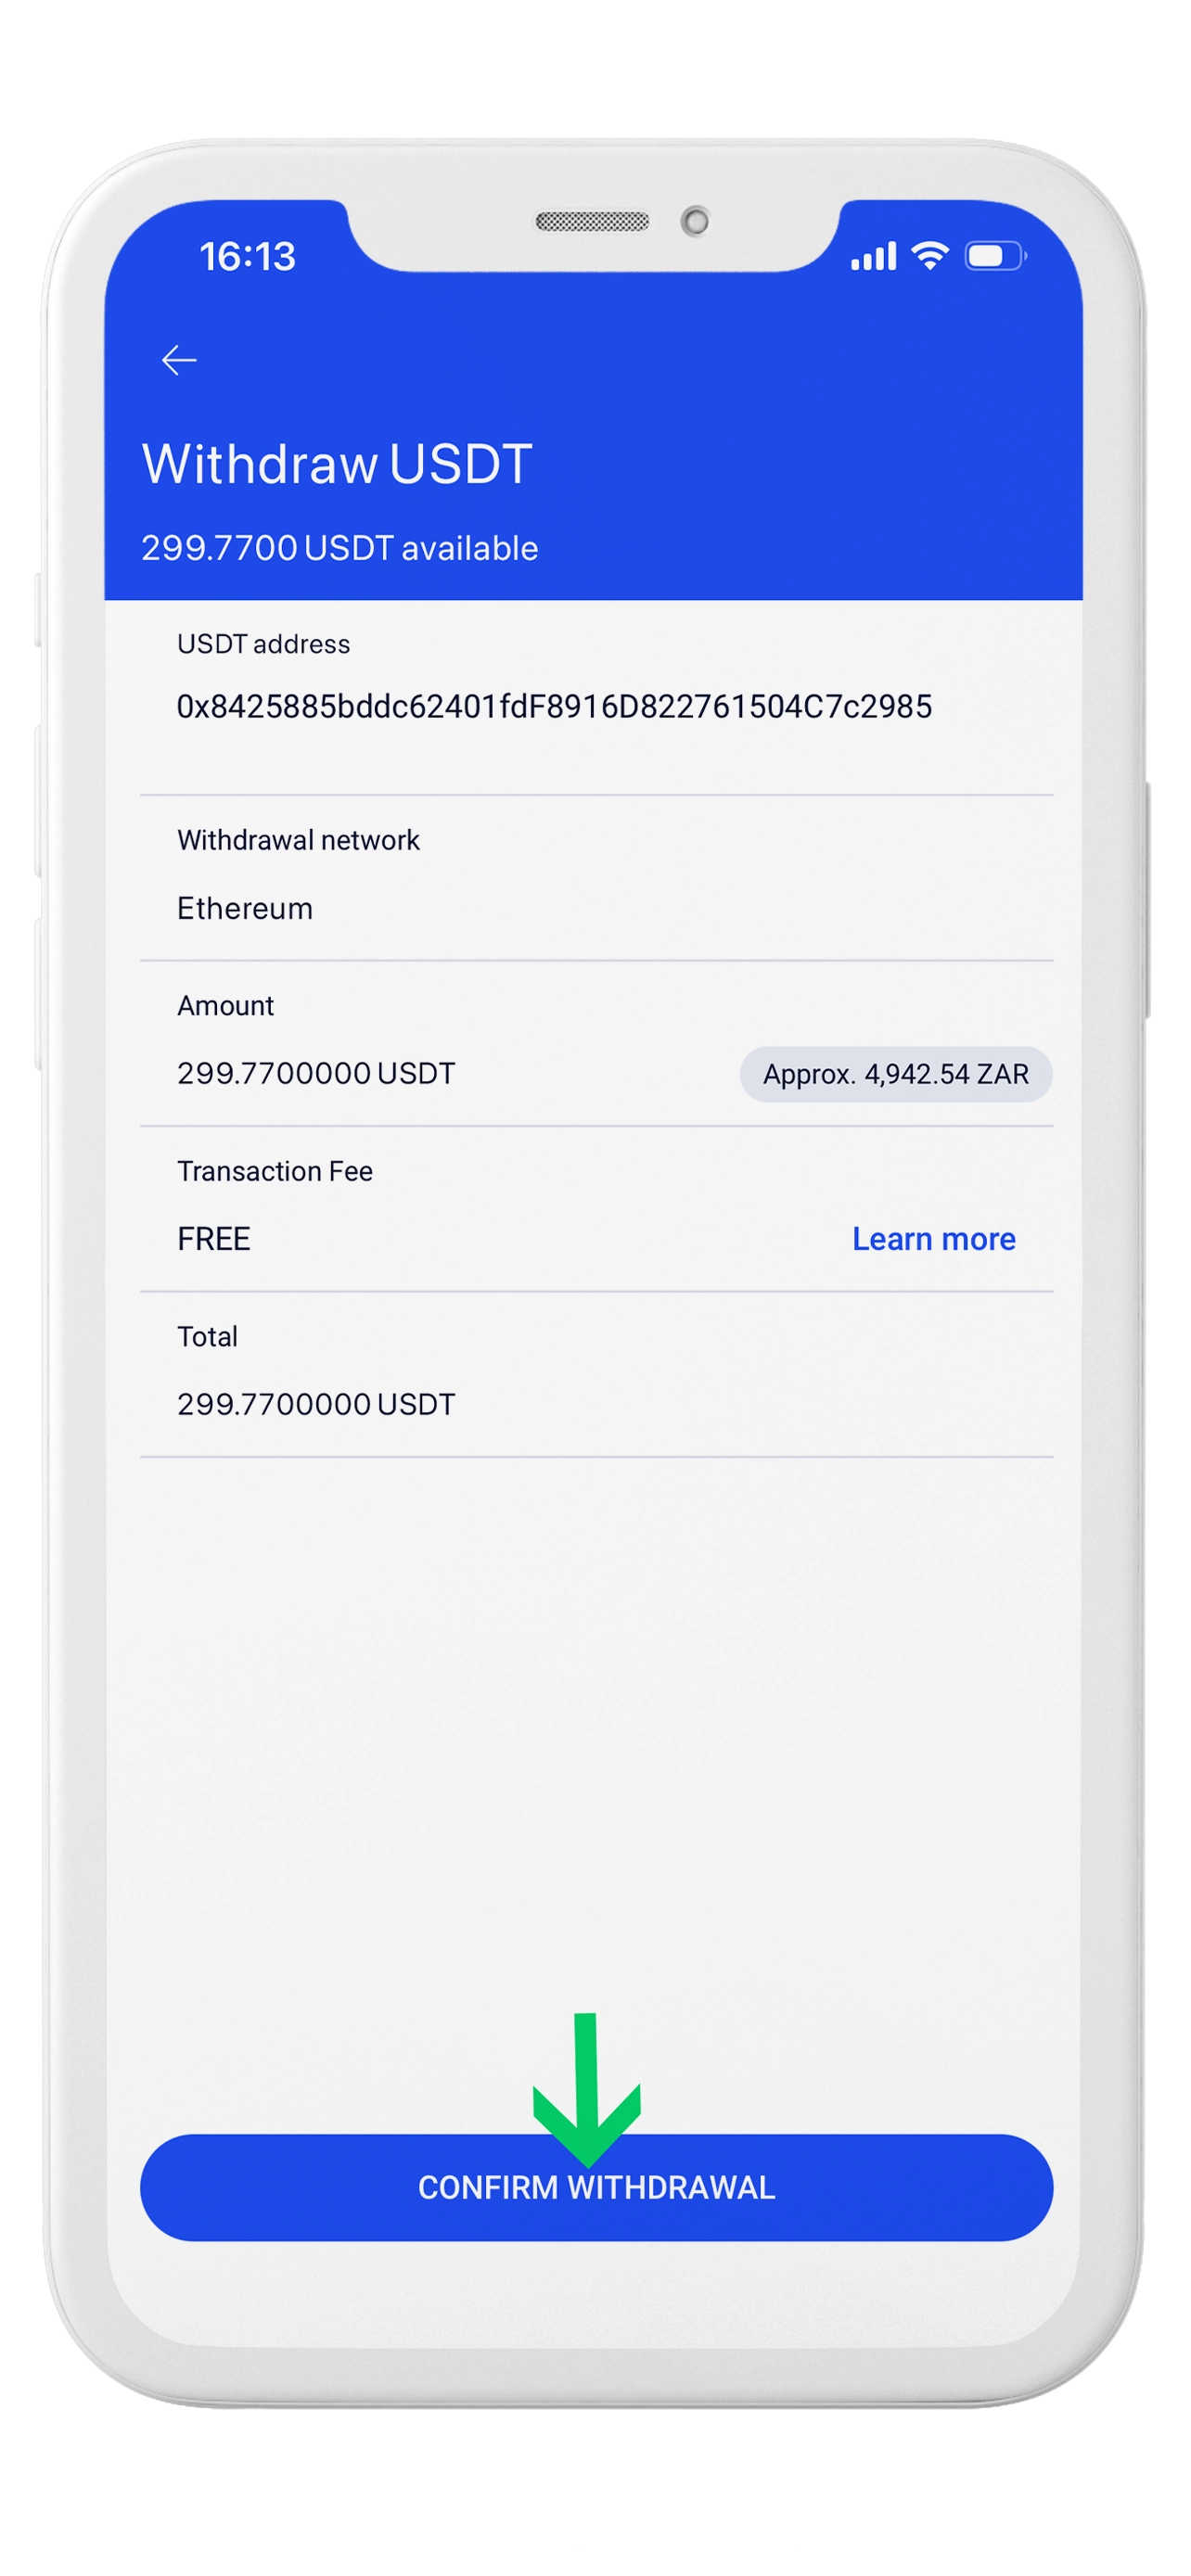
Use this checklist before the final VALR withdrawal confirmation.
Your bank payment to VALR must use your unique VALR reference.
You are buying and withdrawing USDT, not BTC or another digital asset.
The VALR withdrawal network must match the eMovly deposit network.
Copy and paste the eMovly address. Never type it manually.
Enter the amount shown on the eMovly payment gateway.
Keep the VALR withdrawal confirmation and transaction ID.